There’s a certain magic that happens when a big pot of Classic Chili Con Carne starts simmering on the stove. The aroma alone is enough to draw everyone to the kitchen, a symphony of spices promising warmth and comfort. This isn’t just a recipe in our household; it’s a tradition, a go-to for chilly evenings, game days, or whenever we crave something deeply satisfying. The first time I made this particular version, tweaking ratios and simmering times, I knew I’d landed on something special. The kids, usually quick to voice their critiques, were surprisingly silent, too busy scraping their bowls clean. My partner, a self-proclaimed chili aficionado, declared it “the best batch yet,” high praise indeed! It’s the kind of meal that creates memories, one delicious spoonful at a time, robust with flavor, perfectly spiced, and hearty enough to satisfy the biggest appetites. It’s a culinary hug in a bowl, and I’m thrilled to share how you can bring this comforting classic into your own home.
Ingredients: The Foundation of Flavor
Crafting the perfect Classic Chili Con Carne starts with quality ingredients. Each component plays a vital role in building layers of deep, complex flavor. Don’t be tempted to skimp on the spices, as they are the heart and soul of this dish.
- For the Meat & Aromatics:
- Ground Beef: 2 lbs (80/20 or 85/15 chuck is ideal for flavor and moisture)
- Olive Oil or Vegetable Oil: 2 tablespoons
- Large Yellow Onions: 2, finely chopped
- Garlic Cloves: 6-8, minced (about 2 tablespoons)
- Green Bell Pepper: 1 large, cored, seeded, and diced
- Red Bell Pepper: 1 large, cored, seeded, and diced (optional, for color and sweetness)
- Jalapeño Peppers: 1-2, minced (seeds removed for less heat, or kept for more kick; optional)
- For the Spice Blend (The Soul of the Chili):
- Chili Powder: 1/4 cup (use a good quality, robust blend)
- Ground Cumin: 2 tablespoons
- Smoked Paprika: 1 tablespoon (for a hint of smokiness)
- Dried Oregano: 1 tablespoon (preferably Mexican oregano)
- Cayenne Pepper: 1/2 – 1 teaspoon (adjust to your heat preference)
- Ground Black Pepper: 1 teaspoon
- Kosher Salt: 2 teaspoons (plus more to taste later)
- Bay Leaves: 2
- For the Rich Tomato Base & Beans:
- Tomato Paste: 1 can (6 oz)
- Diced Tomatoes: 1 can (28 oz), undrained
- Crushed Tomatoes: 1 can (15 oz)
- Beef Broth or Stock: 2 cups (low sodium preferred)
- Kidney Beans: 2 cans (15 oz each), rinsed and drained (dark or light red)
- Pinto Beans: 1 can (15 oz), rinsed and drained (optional, for variety)
- Optional Flavor Enhancers (The Secret Touches):
- Unsweetened Cocoa Powder: 1 tablespoon (adds depth, not chocolate flavor)
- Worcestershire Sauce: 1 tablespoon
- Brown Sugar or Maple Syrup: 1 teaspoon (to balance acidity)
- Masa Harina: 2 tablespoons mixed with 1/4 cup warm water (for thickening, optional, add in the last 30 minutes)
Instructions: Simmering to Perfection
Patience is key to a truly great chili. Allowing the flavors to meld and deepen over a slow simmer is what transforms good ingredients into an exceptional meal. Follow these steps for a chili that will have everyone asking for your secret.
- Brown the Beef:
- Heat the olive oil in a large, heavy-bottomed pot or Dutch oven over medium-high heat.
- Add the ground beef and cook, breaking it apart with a spoon, until it’s nicely browned, about 8-10 minutes. Don’t overcrowd the pot; brown in batches if necessary to ensure proper browning rather than steaming. This step is crucial for developing a deep, savory flavor base.
- Once browned, drain off any excess fat from the pot, leaving about a tablespoon for the vegetables.
- Sauté the Aromatics:
- Add the chopped onions, green bell pepper, and red bell pepper (if using) to the pot with the remaining fat.
- Sauté over medium heat until the onions are translucent and the peppers have softened, about 6-8 minutes, stirring occasionally.
- Add the minced garlic and jalapeño (if using) and cook for another 1-2 minutes until fragrant. Be careful not to burn the garlic.
- Bloom the Spices:
- Add the chili powder, ground cumin, smoked paprika, dried oregano, cayenne pepper, ground black pepper, and kosher salt to the pot with the vegetables.
- Stir constantly and cook for 1-2 minutes until the spices are fragrant. This step, known as “blooming,” toasts the spices and intensifies their flavors significantly.
- Incorporate Tomato Paste:
- Add the tomato paste to the pot. Stir well and cook for 2-3 minutes, allowing it to caramelize slightly. This deepens the tomato flavor and removes any raw taste.
- Combine and Build the Chili:
- Return the browned ground beef to the pot. Stir to combine it thoroughly with the vegetables and spices.
- Pour in the diced tomatoes (undrained), crushed tomatoes, and beef broth. Add the bay leaves.
- If using, stir in the optional cocoa powder, Worcestershire sauce, and brown sugar/maple syrup. These ingredients add layers of complexity and balance the acidity of the tomatoes.
- Simmer to Meld Flavors:
- Bring the chili to a gentle simmer. Once simmering, reduce the heat to low, cover the pot, and let it cook for at least 1.5 hours, stirring occasionally to prevent sticking. For the best flavor development, aim for 2-3 hours of simmering. The longer it simmers, the more the flavors will meld and deepen. If the chili becomes too thick during simmering, add a little more beef broth or water to reach your desired consistency.
- Add the Beans (and Optional Thickener):
- After the initial simmering period, stir in the rinsed and drained kidney beans and pinto beans (if using).
- If you prefer a thicker chili and are using masa harina, mix the 2 tablespoons of masa harina with 1/4 cup of warm water to create a slurry. Stir this slurry into the chili.
- Continue to simmer, uncovered, for another 30-45 minutes, allowing the beans to heat through and the flavors to fully incorporate. The masa harina, if used, will also thicken the chili during this time.
- Taste and Adjust Seasoning:
- Remove the bay leaves.
- Taste the chili carefully. Adjust seasoning as needed. You may want to add more salt, a pinch more cayenne for heat, or even a splash of apple cider vinegar for brightness if it tastes a bit flat. This is your chance to fine-tune the flavor profile to your liking.
- Rest Before Serving (Optional but Recommended):
- If time allows, turn off the heat and let the chili rest for 15-30 minutes before serving. This allows the flavors to settle and meld even further. Chili is often even better the next day!
Nutrition Facts
- Servings: This recipe yields approximately 8-10 generous servings.
- Calories per serving (approximate): 450-550 calories.
- Disclaimer: Nutritional information is an estimate and can vary significantly based on specific ingredient brands, fat content of the beef, portion sizes, and any added toppings. This estimate does not include toppings.
Preparation Time
- Prep Time: 25-30 minutes (chopping vegetables, measuring spices)
- Cook Time: Minimum 2 hours (1.5 hours initial simmer + 30 minutes with beans), ideally 3-4 hours for maximum flavor development.
- Total Time: Approximately 2.5 – 4.5 hours
How to Serve: Elevate Your Chili Experience
Serving Classic Chili Con Carne is an experience in itself, offering endless possibilities for customization. Here are some popular and creative ways to enjoy your delicious, homemade chili:
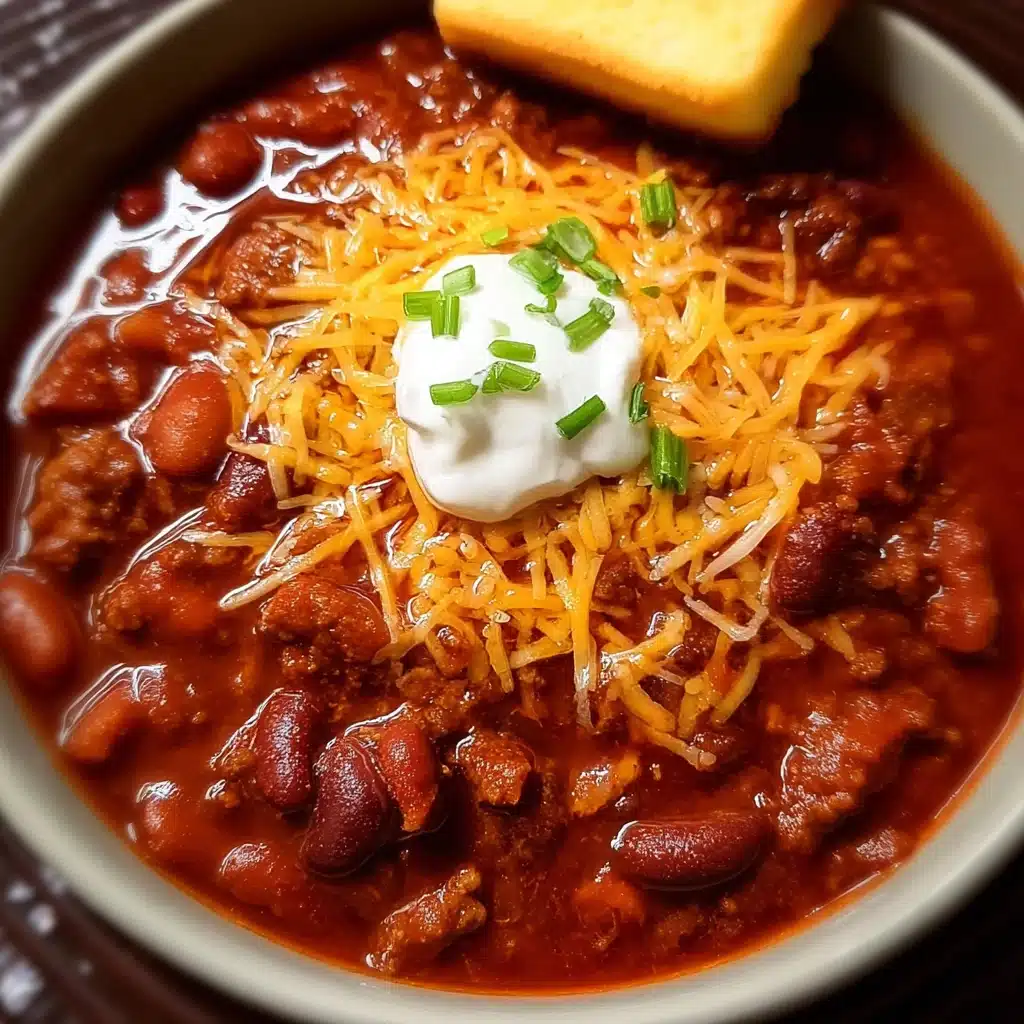
- The Classic Bowl:
- Ladle generously into individual bowls.
- Offer a “toppings bar” so everyone can customize their chili.
- Essential Toppings (The “Must-Haves”):
- Shredded Cheese: Cheddar, Monterey Jack, or a Mexican blend are classic choices.
- Sour Cream or Plain Greek Yogurt: Adds a creamy, tangy counterpoint to the rich chili.
- Chopped Green Onions or Chives: For a fresh, mild oniony bite.
- Diced Red or White Onion: For a sharper, crunchier onion flavor.
- Fresh Cilantro: Adds a burst of freshness.
- Sliced Jalapeños (fresh or pickled): For those who like an extra kick of heat.
- Next-Level Toppings (Get Creative!):
- Crushed Tortilla Chips or Fritos: For added crunch and salty flavor.
- Avocado Slices or Guacamole: Adds creaminess and healthy fats.
- Hot Sauce: Allow individuals to ramp up the heat to their preference.
- A squeeze of Lime Juice: Brightens up all the flavors.
- Pickled Red Onions: Adds a tangy, vibrant element.
- Corn Kernels (roasted or fresh): For a touch of sweetness and texture.
- Perfect Pairings (What to Serve Alongside):
- Cornbread: A classic Southern accompaniment. Sweet or savory, muffins or slices. The slight sweetness of cornbread beautifully complements the savory chili.
- White Rice or Brown Rice: Serve the chili over a bed of fluffy rice to soak up all the delicious sauce.
- Crusty Bread or Dinner Rolls: Perfect for dipping and mopping up every last bit.
- Saltine Crackers or Oyster Crackers: A simple, crunchy addition.
- Simple Green Salad: A light, refreshing salad with a vinaigrette dressing can balance the richness of the chili.
- Creative Ways to Use Leftover Chili (If You Have Any!):
- Chili Dogs: Ladle over hot dogs in buns.
- Chili Cheese Fries: Smother French fries with chili and melted cheese.
- Chili Baked Potatoes: Split open a baked potato and fill it with chili and toppings.
- Chili Mac: Mix with cooked macaroni and top with cheese, then bake for a hearty casserole.
- Chili Nachos: Layer tortilla chips with chili, cheese, and your favorite nacho toppings.
- Frito Pie: A Texan classic – serve chili over a bed of Fritos corn chips, topped with cheese and onions, often right in the Fritos bag!
Additional Tips for Chili Success
Elevate your chili game with these five expert tips:
- Choose Your Meat Wisely: While 80/20 ground chuck is excellent for flavor and moisture, don’t be afraid to experiment. A coarser grind of beef, or even cubed chuck roast (braised until tender), can provide a more “steak-like” texture. For a leaner option, ground turkey or chicken can be used, but you might need to add a bit more fat (like extra olive oil) or flavorful broth to compensate. Browning the meat properly, regardless of type, is non-negotiable for deep flavor.
- Spice Level Control: The beauty of homemade chili is customization. For a milder chili, reduce or omit the cayenne pepper and ensure your chili powder isn’t an extra-hot variety. Remove all seeds and membranes from jalapeños. For a fiery kick, increase cayenne, use a spicier chili powder (like chipotle chili powder for smoky heat), keep jalapeño seeds, or even add a dash of your favorite potent hot sauce during the simmer. Remember, you can always add more heat, but it’s hard to take it away.
- The Magic of a Long Simmer: While the recipe calls for a minimum of 1.5 hours, chili truly benefits from a long, slow simmer. Two to four hours, or even longer on a very low heat, allows the flavors to meld, deepen, and become more complex. The meat will become incredibly tender. If simmering for an extended period, you might need to add a bit more broth or water to maintain the desired consistency. A slow cooker is also an excellent tool for this, allowing for 6-8 hours of gentle cooking on low.
- Make Ahead & Freezing for Future Feasts: Chili is one of those dishes that famously tastes even better the next day as the flavors continue to marry. Make a large batch and enjoy leftovers for a few days. For longer storage, chili freezes beautifully. Cool it completely, then transfer to airtight freezer-safe containers or heavy-duty freezer bags. It can be frozen for up to 3-4 months. Thaw overnight in the refrigerator and reheat gently on the stovetop or in the microwave.
- Unlock “Secret” Depths of Flavor: Small additions can make a big difference.
- Coffee or Espresso Powder: A teaspoon of instant espresso powder or a quarter cup of strong brewed coffee can enhance the savory, beefy notes.
- Dark Beer: Using a stout or porter instead of some of the beef broth can add malty depth.
- A Splash of Vinegar: Towards the end of cooking, a teaspoon or two of apple cider vinegar or red wine vinegar can brighten the overall flavor profile, especially if it tastes a little heavy or flat.
- Anchovy Paste (don’t worry!): A tiny amount (1/2 teaspoon) dissolved into the sauce adds an umami undertone without tasting fishy.
FAQ Section: Your Chili Questions Answered
Q1: Can I make this Classic Chili Con Carne in a slow cooker?
A1: Absolutely! A slow cooker is perfect for chili. To adapt this recipe:
1. Brown the ground beef in a skillet as directed, then drain the fat. Transfer the beef to your slow cooker.
2. Sauté the onions, bell peppers, garlic, and jalapeños in the same skillet. Add the spices and tomato paste, cooking as directed to bloom them.
3. Transfer the vegetable and spice mixture to the slow cooker.
4. Add the diced tomatoes, crushed tomatoes, beef broth, bay leaves, and any optional flavor enhancers (cocoa, Worcestershire, sugar) to the slow cooker. Stir everything together.
5. Cover and cook on LOW for 6-8 hours or on HIGH for 3-4 hours.
6. About 30-45 minutes before serving, stir in the rinsed and drained beans. If using masa harina, stir in the slurry at this time as well.
7. Taste and adjust seasonings before serving.
Q2: How can I adjust the thickness of my chili?
A2: There are several ways to adjust your chili’s consistency:
* To Thicken:
* Masa Harina Slurry: As mentioned in the recipe, mix 2 tablespoons of masa harina with 1/4 cup warm water and stir it in during the last 30-45 minutes of cooking. This adds authentic flavor and thickness.
* Cornstarch Slurry: Mix 1-2 tablespoons of cornstarch with an equal amount of cold water, then stir into the simmering chili. Cook for a few more minutes until thickened.
* Simmer Uncovered: Simply remove the lid and continue to simmer, allowing excess liquid to evaporate.
* Mash Some Beans: Remove about a cup of beans, mash them with a fork or potato masher, and return them to the pot. The starches from the beans will help thicken the chili.
* To Thin: If your chili becomes too thick, simply stir in a little more beef broth, water, or even tomato juice until it reaches your desired consistency.
Q3: What’s the best type of chili powder to use?
A3: “Chili powder” is typically a blend of ground chili peppers and other spices like cumin, oregano, and garlic powder. The quality and composition can vary greatly by brand.
* Standard Chili Powder: Most supermarket brands (like McCormick or Gebhardt) offer a good, balanced blend suitable for classic chili. Gebhardt is a Texan favorite known for its authentic flavor.
* Ancho Chili Powder: Made from dried poblano peppers, it has a mild to medium heat with sweet, smoky, and slightly fruity notes. It adds great depth.
* Chipotle Chili Powder: Made from smoked and dried jalapeños, it provides a distinctive smoky flavor and medium to hot heat.
* Single-Varietal Powders: For more adventurous chili makers, exploring powders from specific chiles like Guajillo, Pasilla, or New Mexico chiles can add unique flavor profiles.
*For this recipe, a good quality, all-purpose American chili powder blend is recommended. Feel free to experiment with adding a tablespoon of ancho or chipotle powder alongside your main chili powder for extra complexity.
Q4: Can I make this chili vegetarian or vegan?
A4: Yes, you can adapt this recipe for a delicious vegetarian or vegan chili!
* Meat Substitute: Omit the ground beef. You can replace it with:
* More Beans: Double or triple the amount of beans, using a variety like black beans, cannellini beans, in addition to kidney and pinto.
* Lentils: Brown or green lentils hold their shape well and add an earthy flavor. Add about 1-1.5 cups of dried lentils with the broth (you may need extra broth).
* Plant-Based Ground “Meat”: Use your favorite brand of vegetarian or vegan crumbles. Brown them as you would ground beef.
* Mushrooms & Vegetables: Add hearty chopped mushrooms (like cremini or portobello), sweet potatoes, butternut squash, or corn for extra texture and flavor.
* Broth: Use vegetable broth instead of beef broth.
* Worcestershire Sauce: Traditional Worcestershire sauce contains anchovies. Use a vegan Worcestershire sauce or a substitute like soy sauce or tamari for umami.
* Toppings: Ensure your toppings are vegetarian/vegan friendly (e.g., vegan sour cream, vegan cheese).
Q5: How long will chili con carne last, and how should I store it?
A5: Proper storage is key to enjoying your chili safely.
* Refrigerator: Allow the chili to cool to room temperature (but no longer than 2 hours out) before transferring it to an airtight container. Stored properly in the refrigerator, chili will last for 3-4 days.
* Freezer: For longer storage, chili freezes exceptionally well. Cool completely, then portion into freezer-safe airtight containers or heavy-duty freezer bags (removing as much air as possible). Frozen chili will maintain its best quality for 3-4 months, but can be safe to eat for up to 6 months.
* Reheating: Thaw frozen chili overnight in the refrigerator. Reheat gently on the stovetop over medium-low heat, stirring occasionally, until heated through. You can also reheat in the microwave, stirring periodically. You may need to add a splash of broth or water if it has thickened too much upon reheating.

Classic Chili Con Carne Recipe
Ingredients
- For the Meat & Aromatics:
- Ground Beef: 2 lbs (80/20 or 85/15 chuck is ideal for flavor and moisture)
- Olive Oil or Vegetable Oil: 2 tablespoons
- Large Yellow Onions: 2, finely chopped
- Garlic Cloves: 6-8, minced (about 2 tablespoons)
- Green Bell Pepper: 1 large, cored, seeded, and diced
- Red Bell Pepper: 1 large, cored, seeded, and diced (optional, for color and sweetness)
- Jalapeño Peppers: 1-2, minced (seeds removed for less heat, or kept for more kick; optional)
- For the Spice Blend (The Soul of the Chili):
- Chili Powder: 1/4 cup (use a good quality, robust blend)
- Ground Cumin: 2 tablespoons
- Smoked Paprika: 1 tablespoon (for a hint of smokiness)
- Dried Oregano: 1 tablespoon (preferably Mexican oregano)
- Cayenne Pepper: 1/2 – 1 teaspoon (adjust to your heat preference)
- Ground Black Pepper: 1 teaspoon
- Kosher Salt: 2 teaspoons (plus more to taste later)
- Bay Leaves: 2
- For the Rich Tomato Base & Beans:
- Tomato Paste: 1 can (6 oz)
- Diced Tomatoes: 1 can (28 oz), undrained
- Crushed Tomatoes: 1 can (15 oz)
- Beef Broth or Stock: 2 cups (low sodium preferred)
- Kidney Beans: 2 cans (15 oz each), rinsed and drained (dark or light red)
- Pinto Beans: 1 can (15 oz), rinsed and drained (optional, for variety)
- Optional Flavor Enhancers (The Secret Touches):
- Unsweetened Cocoa Powder: 1 tablespoon (adds depth, not chocolate flavor)
- Worcestershire Sauce: 1 tablespoon
- Brown Sugar or Maple Syrup: 1 teaspoon (to balance acidity)
- Masa Harina: 2 tablespoons mixed with 1/4 cup warm water (for thickening, optional, add in the last 30 minutes)
Instructions
- Brown the Beef:
- Heat the olive oil in a large, heavy-bottomed pot or Dutch oven over medium-high heat.
- Add the ground beef and cook, breaking it apart with a spoon, until it’s nicely browned, about 8-10 minutes. Don’t overcrowd the pot; brown in batches if necessary to ensure proper browning rather than steaming. This step is crucial for developing a deep, savory flavor base.
- Once browned, drain off any excess fat from the pot, leaving about a tablespoon for the vegetables.
- Sauté the Aromatics:
- Add the chopped onions, green bell pepper, and red bell pepper (if using) to the pot with the remaining fat.
- Sauté over medium heat until the onions are translucent and the peppers have softened, about 6-8 minutes, stirring occasionally.
- Add the minced garlic and jalapeño (if using) and cook for another 1-2 minutes until fragrant. Be careful not to burn the garlic.
- Bloom the Spices:
- Add the chili powder, ground cumin, smoked paprika, dried oregano, cayenne pepper, ground black pepper, and kosher salt to the pot with the vegetables.
- Stir constantly and cook for 1-2 minutes until the spices are fragrant. This step, known as “blooming,” toasts the spices and intensifies their flavors significantly.
- Incorporate Tomato Paste:
- Add the tomato paste to the pot. Stir well and cook for 2-3 minutes, allowing it to caramelize slightly. This deepens the tomato flavor and removes any raw taste.
- Combine and Build the Chili:
- Return the browned ground beef to the pot. Stir to combine it thoroughly with the vegetables and spices.
- Pour in the diced tomatoes (undrained), crushed tomatoes, and beef broth. Add the bay leaves.
- If using, stir in the optional cocoa powder, Worcestershire sauce, and brown sugar/maple syrup. These ingredients add layers of complexity and balance the acidity of the tomatoes.
- Simmer to Meld Flavors:
- Bring the chili to a gentle simmer. Once simmering, reduce the heat to low, cover the pot, and let it cook for at least 1.5 hours, stirring occasionally to prevent sticking. For the best flavor development, aim for 2-3 hours of simmering. The longer it simmers, the more the flavors will meld and deepen. If the chili becomes too thick during simmering, add a little more beef broth or water to reach your desired consistency.
- Add the Beans (and Optional Thickener):
- After the initial simmering period, stir in the rinsed and drained kidney beans and pinto beans (if using).
- If you prefer a thicker chili and are using masa harina, mix the 2 tablespoons of masa harina with 1/4 cup of warm water to create a slurry. Stir this slurry into the chili.
- Continue to simmer, uncovered, for another 30-45 minutes, allowing the beans to heat through and the flavors to fully incorporate. The masa harina, if used, will also thicken the chili during this time.
- Taste and Adjust Seasoning:
- Remove the bay leaves.
- Taste the chili carefully. Adjust seasoning as needed. You may want to add more salt, a pinch more cayenne for heat, or even a splash of apple cider vinegar for brightness if it tastes a bit flat. This is your chance to fine-tune the flavor profile to your liking.
- Rest Before Serving (Optional but Recommended):
- If time allows, turn off the heat and let the chili rest for 15-30 minutes before serving. This allows the flavors to settle and meld even further. Chili is often even better the next day!
Nutrition
- Serving Size: One Normal Portion
- Calories: 450-550