There are few dishes as universally comforting and deeply satisfying as a steaming bowl of Classic Chili Con Carne. For my family, it’s more than just a meal; it’s an event. The rich aroma starts to fill the house hours before it’s ready, building anticipation with every simmer. I’ve tweaked and perfected this recipe over the years, and it’s become a go-to for chilly evenings, game days, or whenever we crave something hearty and flavorful. The kids love customizing their bowls with an array of toppings, and my husband often remarks that it’s “the best chili he’s ever had” – high praise indeed! It’s the kind of recipe that brings everyone to the table, sparks conversation, and leaves behind a warm glow long after the last spoonful is gone. This version strikes a perfect balance: robustly beefy, complexly spiced without being overwhelmingly hot (unless you want it to be!), and with a texture that’s thick and luxurious. It’s a true celebration of simple ingredients transformed into something extraordinary.
The Enduring Appeal of Classic Chili Con Carne
Chili Con Carne, often simply called “chili,” is a dish with a history as rich and spicy as its flavor. While its exact origins are debated – with claims from Texas, Mexico, and even the Canary Islands – its status as a beloved American comfort food is undeniable. “Chili con carne” literally translates from Spanish to “chili peppers with meat,” and at its heart, that’s what a classic version aims to deliver: tender meat simmered in a flavorful, chili pepper-infused sauce.
What makes a chili “classic”? It typically involves ground or cubed beef, a blend of chili powders and spices like cumin and oregano, onions, garlic, and tomatoes. The inclusion of beans is a historically contentious point, with Texan purists often insisting on a bean-free “bowl o’ red.” However, for many, beans are an integral part of what makes chili, well, chili – adding texture, heartiness, and nutritional value. This recipe embraces beans for a well-rounded, crowd-pleasing dish.
Why This Classic Chili Recipe Will Become Your Go-To
This particular recipe isn’t just about following steps; it’s about building layers of flavor. Here’s why it stands out:
- Flavor Depth: We’re not just dumping spices in. We bloom them to awaken their aromatic oils, and we simmer low and slow to allow every ingredient to meld beautifully. The combination of different chili powders, smoked paprika, and a hint of cocoa powder (a secret weapon!) creates an incredibly complex and savory base.
- Perfect Texture: The balance between the tender ground beef, the slightly softened beans, and the rich, thick sauce is key. We achieve this through proper browning of the meat and a long, gentle simmer that breaks down the tomatoes and thickens the sauce naturally.
- Customizable Heat: This recipe provides a solid, medium-heat foundation. However, it’s incredibly easy to dial the spice level up or down to suit your preference, with suggestions included.
- Crowd-Pleaser & Make-Ahead Marvel: This recipe can easily be doubled or tripled for larger gatherings. Better yet, chili is one of those magical dishes that often tastes even better the next day, making it perfect for meal prep or stress-free entertaining.
Complete Recipe with Ingredients Amount
This recipe aims for a balanced, deeply flavorful chili. Feel free to adjust spice levels to your liking.
Yields: 8-10 servings
Prep time: 30 minutes
Cook time: 2 – 3 hours (or longer for even deeper flavor)
Ingredients:
- For the Meat & Base:
- 2 tablespoons olive oil or vegetable oil
- 2 pounds ground beef (preferably 80/20 or 85/15 ground chuck for flavor and moisture)
- 2 medium yellow onions, chopped (about 2 cups)
- 4-6 cloves garlic, minced (about 2 tablespoons)
- 1 large red bell pepper, cored, seeded, and chopped
- 1 large green bell pepper, cored, seeded, and chopped
- 2 jalapeño peppers, minced (seeds removed for less heat, optional)
- For the Spices & Seasonings:
- 1/4 cup chili powder (use a good quality, mild to medium blend)
- 2 tablespoons ground cumin
- 1 tablespoon smoked paprika (sweet or hot, your preference)
- 1 tablespoon dried oregano (Mexican oregano if you have it)
- 1 teaspoon unsweetened cocoa powder (optional, for depth)
- 1 teaspoon cayenne pepper (optional, adjust to taste for heat)
- 2 teaspoons salt (or to taste)
- 1 teaspoon black pepper (or to taste)
- 1-2 bay leaves
- For the Liquid & Body:
- 1 (28-ounce) can crushed tomatoes
- 1 (15-ounce) can diced tomatoes, undrained
- 1 (15-ounce) can tomato sauce
- 2 cups beef broth (low sodium preferred)
- 2 tablespoons tomato paste
- 1 tablespoon Worcestershire sauce
- 1 tablespoon apple cider vinegar or red wine vinegar (for brightness at the end)
- For the Beans (Optional but Recommended):
- 2 (15-ounce) cans kidney beans, rinsed and drained
- 1 (15-ounce) can pinto beans or black beans, rinsed and drained
Instructions: Crafting Your Perfect Pot of Chili
Follow these steps carefully to build layers of flavor for an unforgettable chili.
- Brown the Beef:
- Heat the olive oil in a large, heavy-bottomed pot or Dutch oven over medium-high heat.
- Add the ground beef and cook, breaking it apart with a spoon, until well browned, about 8-10 minutes. Don’t overcrowd the pot; brown in batches if necessary. Good browning equals deep flavor (Maillard reaction!).
- Once browned, drain off any excess fat, leaving about 1-2 tablespoons in the pot for sautéing the vegetables. Remove the beef from the pot and set aside.
- Sauté the Aromatics:
- To the same pot, add the chopped onions and bell peppers (red and green). Sauté over medium heat until softened and lightly translucent, about 6-8 minutes, stirring occasionally.
- Add the minced garlic and jalapeños (if using) and cook for another 1-2 minutes until fragrant. Be careful not to burn the garlic.
- Bloom the Spices:
- Return the browned beef to the pot with the vegetables.
- Add the chili powder, ground cumin, smoked paprika, dried oregano, cocoa powder (if using), and cayenne pepper (if using). Stir well to coat the meat and vegetables.
- Cook for 2-3 minutes, stirring constantly, until the spices are very fragrant. This step, called “blooming,” toasts the spices and intensifies their flavor.
- Build the Chili Base:
- Stir in the tomato paste and cook for 1-2 minutes, allowing it to caramelize slightly.
- Add the crushed tomatoes, diced tomatoes (undrained), tomato sauce, beef broth, and Worcestershire sauce. Stir everything together thoroughly.
- Add the bay leaves, salt, and black pepper. Bring the mixture to a gentle simmer.
- Simmer for Flavor Fusion:
- Once simmering, reduce the heat to low, cover the pot, and let the chili cook for at least 1.5 hours, stirring occasionally to prevent sticking.
- For the best, most developed flavor, aim for a 2-3 hour simmer. The longer it simmers, the more tender the meat will become and the more the flavors will meld. If the chili becomes too thick during simmering, you can add a little more beef broth or water to reach your desired consistency.
- Add the Beans (If Using):
- After the initial simmering period (at least 1.5 hours), stir in the rinsed and drained kidney beans and pinto/black beans.
- Continue to simmer, covered, for another 30-60 minutes, allowing the beans to heat through and absorb the chili flavors.
- Finishing Touches:
- Taste the chili and adjust seasonings as needed. You might want more salt, pepper, or a pinch more cayenne for heat.
- Stir in the apple cider vinegar or red wine vinegar. This brightens up the flavors, especially after a long simmer.
- Remove the bay leaves before serving.
- Rest (Optional but Recommended):
- If you have the time, turn off the heat and let the chili rest for 20-30 minutes before serving. This allows the flavors to settle and meld even further. Chili is famously even better the next day!
Nutrition Facts (Estimated)
- Servings: Approximately 8-10 servings
- Calories per serving (estimated): Around 450-550 calories, depending on the exact leanness of the beef and if all optional ingredients are used. This estimate includes beans.
Please note: Nutritional information is an estimate and can vary based on specific ingredients, brands, and portion sizes.
Preparation Time Breakdown
- Active Preparation Time (Chopping, Browning, Sautéing): Approximately 30-40 minutes. This includes dicing vegetables, mincing garlic, and browning the meat.
- Simmering Time: 2 to 3 hours (minimum 1.5 hours if beans are added earlier, but longer is better for flavor development).
- Total Time: Approximately 2.5 to 3.5 hours (or more, if you opt for a very long simmer).
This time investment is well worth it for the depth of flavor achieved. Much of the cooking time is hands-off simmering, allowing you to attend to other things.
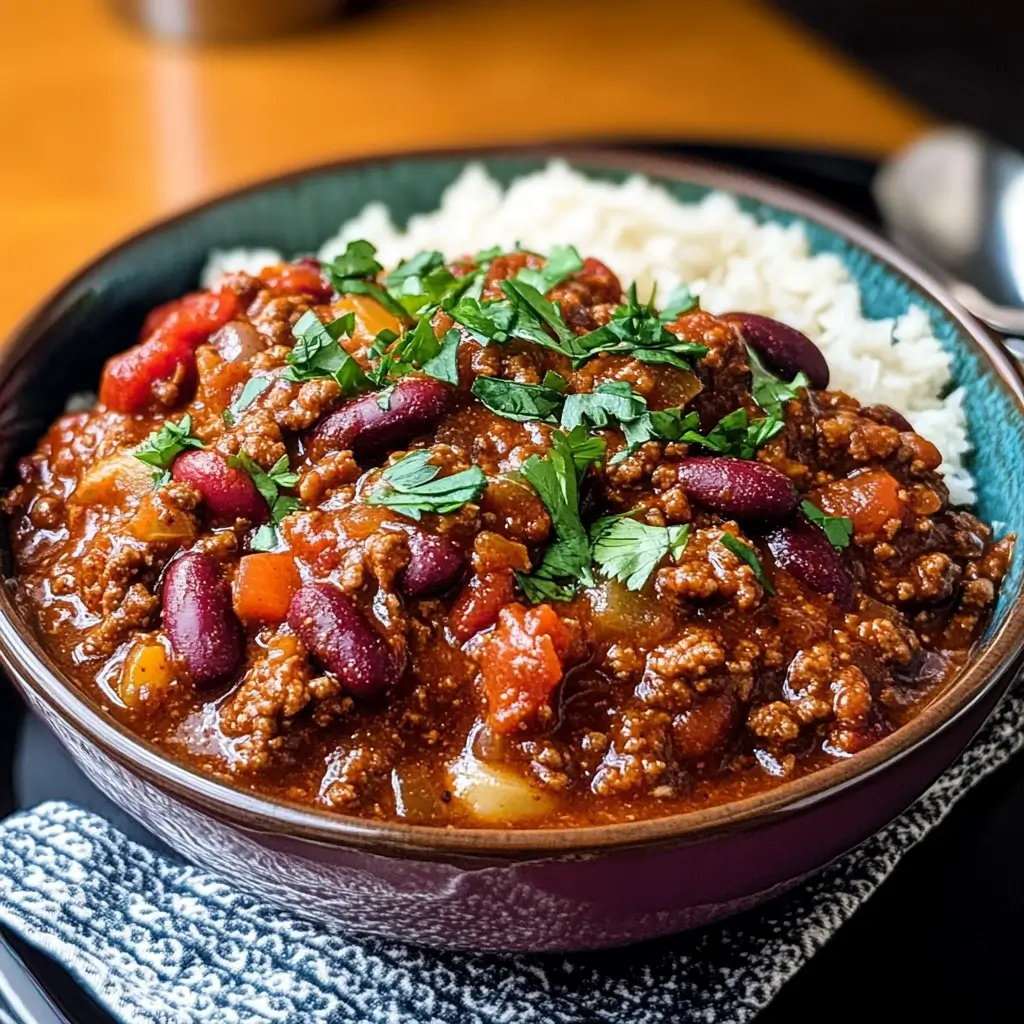
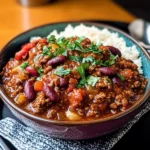
How to Serve: The Ultimate Chili Experience
Serving chili is all about the toppings! Set up a chili bar and let everyone customize their bowl. Here are some classic and adventurous ideas:
- Classic Toppings:
- Shredded Cheese: Cheddar, Monterey Jack, Colby Jack, or a Mexican blend are popular choices.
- Sour Cream or Plain Greek Yogurt: Adds a creamy, tangy counterpoint.
- Chopped Green Onions or Chives: For fresh, mild onion flavor.
- Diced Red Onion or White Onion: For a sharper bite.
- Fresh Cilantro: Bright, herbaceous notes.
- Crushed Tortilla Chips or Corn Chips (like Fritos): For crunch and salty flavor.
- Sliced or Pickled Jalapeños: For an extra kick of heat.
- Adventurous & Gourmet Toppings:
- Cotija Cheese: A crumbly, salty Mexican cheese.
- Avocado Slices or Guacamole: Creamy and rich.
- A squeeze of Fresh Lime Juice: Brightens all the flavors.
- Hot Sauce: Let everyone choose their favorite brand and heat level.
- Crispy Fried Onions: For texture and savory flavor.
- Corn Kernels (roasted or fresh): Adds sweetness and texture.
- Radish Slices: For a peppery crunch.
- Perfect Sidekicks for Your Chili:
- Cornbread: A classic pairing. Sweet or savory, muffins or slices.
- Warm Tortillas: Flour or corn, for scooping.
- White or Brown Rice: To serve underneath the chili, making it a more substantial meal.
- Simple Green Salad: With a light vinaigrette to balance the richness.
- Saltine Crackers or Oyster Crackers: Simple and traditional.
Additional Tips for Chili Champions (5 Tips)
- Choose Quality Meat: Using 80/20 or 85/15 ground chuck provides the best flavor and moisture. You can also use a combination of ground beef and ground pork or even diced chuck roast (stew meat) for a chunkier chili, though this will require a longer simmer time to become tender.
- Don’t Rush the Simmer: The magic of chili happens during the long, slow simmer. This is when the flavors meld, the meat becomes incredibly tender, and the sauce thickens and deepens in complexity. If you can, let it go for at least 2 hours, or even 3-4 on very low heat.
- Layer Your Chili Powders: Not all chili powders are created equal. Some are spicier, some are smokier, some are earthier. Consider using a blend of a standard American chili powder with a more specific one like Ancho chili powder (mild, fruity, smoky) or Chipotle chili powder (smoky, moderate heat) for more complexity. Always taste your chili powder first to gauge its heat.
- The “Secret” Ingredients: Small amounts of ingredients like unsweetened cocoa powder, a dash of cinnamon, or even a teaspoon of instant coffee or a dark beer (added with the broth) can add incredible depth and a “what is that?” quality to your chili without being overtly identifiable. This recipe uses cocoa, but feel free to experiment.
- Make it Ahead for Best Flavor: Chili is one of those dishes that significantly improves after a day or two in the refrigerator. The flavors continue to marry and deepen. If you’re planning for an event, making your chili a day or two in advance is a smart move. Just reheat gently on the stovetop or in a slow cooker.
FAQ Section: Your Chili Con Carne Questions Answered
Q1: Can I make this chili in a slow cooker?
A1: Absolutely! Brown the beef and sauté the onions, peppers, and garlic on the stovetop as directed. Bloom the spices. Then, transfer everything to your slow cooker. Add the remaining ingredients (except the vinegar and beans, if adding later). Cook on LOW for 6-8 hours or on HIGH for 3-4 hours. Stir in the beans during the last 30-60 minutes of cooking. Add the vinegar just before serving. A slow cooker is excellent for developing deep flavors with minimal effort.
Q2: How can I adjust the spiciness of the chili?
A2: There are several ways:
* Jalapeños: Include or omit the jalapeños. For more heat, leave some or all of the seeds and membranes in.
* Cayenne Pepper: This is a direct heat source. Start with a small amount (like 1/4 teaspoon) and add more to taste.
* Chili Powder Type: Some chili powders are spicier than others. Choose a mild one if you’re sensitive to heat, or a spicier blend if you like it hot. You can also add specific ground chilies like chipotle powder (smoky heat) or arbol chili powder (sharper heat).
* Hot Sauce: Add your favorite hot sauce to the pot during the last 30 minutes of simmering or serve it on the side.
Q3: What’s the best way to thicken my chili if it’s too thin?
A3:
* Simmer Uncovered: The easiest way is to remove the lid and let the chili simmer for an additional 20-30 minutes, allowing excess liquid to evaporate.
* Cornstarch Slurry: Mix 1-2 tablespoons of cornstarch with an equal amount of cold water until smooth. Stir this slurry into the simmering chili and cook for a few minutes until thickened.
* Masa Harina: For an authentic Tex-Mex flavor and thickening, whisk 1-2 tablespoons of masa harina (corn flour used for tortillas) with a little warm water or broth to make a smooth paste. Stir it into the chili during the last 20-30 minutes of cooking.
* Crushed Tortilla Chips: Adding a handful of finely crushed tortilla chips can also help thicken it and add flavor.
Q4: Can I use different types of beans or omit them altogether?
A4: Yes, definitely! While kidney beans are classic, pinto beans, black beans, or even cannellini beans work well. A mix is often best. If you prefer chili without beans (Texas-style), simply omit them. You might want to add a bit more meat or ensure your sauce is nice and thick if you go beanless.
Q5: How long does chili last, and what’s the best way to store and reheat it?
A5:
* Storage: Let the chili cool completely, then transfer it to airtight containers. It will last in the refrigerator for 3-4 days.
* Freezing: Chili freezes wonderfully! Cool completely, then store in freezer-safe containers or heavy-duty freezer bags for up to 3-4 months (some say up to 6 months). Thaw overnight in the refrigerator.
* Reheating: Reheat gently on the stovetop over medium-low heat, stirring occasionally, until warmed through. You may need to add a splash of water or beef broth if it has thickened too much. You can also reheat individual portions in the microwave.
Classic Chili Con Carne Recipe
Ingredients
- For the Meat & Base:
- 2 tablespoons olive oil or vegetable oil
- 2 pounds ground beef (preferably 80/20 or 85/15 ground chuck for flavor and moisture)
- 2 medium yellow onions, chopped (about 2 cups)
- 4–6 cloves garlic, minced (about 2 tablespoons)
- 1 large red bell pepper, cored, seeded, and chopped
- 1 large green bell pepper, cored, seeded, and chopped
- 2 jalapeño peppers, minced (seeds removed for less heat, optional)
- For the Spices & Seasonings:
- 1/4 cup chili powder (use a good quality, mild to medium blend)
- 2 tablespoons ground cumin
- 1 tablespoon smoked paprika (sweet or hot, your preference)
- 1 tablespoon dried oregano (Mexican oregano if you have it)
- 1 teaspoon unsweetened cocoa powder (optional, for depth)
- 1 teaspoon cayenne pepper (optional, adjust to taste for heat)
- 2 teaspoons salt (or to taste)
- 1 teaspoon black pepper (or to taste)
- 1–2 bay leaves
- For the Liquid & Body:
- 1 (28-ounce) can crushed tomatoes
- 1 (15-ounce) can diced tomatoes, undrained
- 1 (15-ounce) can tomato sauce
- 2 cups beef broth (low sodium preferred)
- 2 tablespoons tomato paste
- 1 tablespoon Worcestershire sauce
- 1 tablespoon apple cider vinegar or red wine vinegar (for brightness at the end)
- For the Beans (Optional but Recommended):
- 2 (15-ounce) cans kidney beans, rinsed and drained
- 1 (15-ounce) can pinto beans or black beans, rinsed and drained
Instructions
- Brown the Beef:
- Heat the olive oil in a large, heavy-bottomed pot or Dutch oven over medium-high heat.
- Add the ground beef and cook, breaking it apart with a spoon, until well browned, about 8-10 minutes. Don’t overcrowd the pot; brown in batches if necessary. Good browning equals deep flavor (Maillard reaction!).
- Once browned, drain off any excess fat, leaving about 1-2 tablespoons in the pot for sautéing the vegetables. Remove the beef from the pot and set aside.
- Sauté the Aromatics:
- To the same pot, add the chopped onions and bell peppers (red and green). Sauté over medium heat until softened and lightly translucent, about 6-8 minutes, stirring occasionally.
- Add the minced garlic and jalapeños (if using) and cook for another 1-2 minutes until fragrant. Be careful not to burn the garlic.
- Bloom the Spices:
- Return the browned beef to the pot with the vegetables.
- Add the chili powder, ground cumin, smoked paprika, dried oregano, cocoa powder (if using), and cayenne pepper (if using). Stir well to coat the meat and vegetables.
- Cook for 2-3 minutes, stirring constantly, until the spices are very fragrant. This step, called “blooming,” toasts the spices and intensifies their flavor.
- Build the Chili Base:
- Stir in the tomato paste and cook for 1-2 minutes, allowing it to caramelize slightly.
- Add the crushed tomatoes, diced tomatoes (undrained), tomato sauce, beef broth, and Worcestershire sauce. Stir everything together thoroughly.
- Add the bay leaves, salt, and black pepper. Bring the mixture to a gentle simmer.
- Simmer for Flavor Fusion:
- Once simmering, reduce the heat to low, cover the pot, and let the chili cook for at least 1.5 hours, stirring occasionally to prevent sticking.
- For the best, most developed flavor, aim for a 2-3 hour simmer. The longer it simmers, the more tender the meat will become and the more the flavors will meld. If the chili becomes too thick during simmering, you can add a little more beef broth or water to reach your desired consistency.
- Add the Beans (If Using):
- After the initial simmering period (at least 1.5 hours), stir in the rinsed and drained kidney beans and pinto/black beans.
- Continue to simmer, covered, for another 30-60 minutes, allowing the beans to heat through and absorb the chili flavors.
- Finishing Touches:
- Taste the chili and adjust seasonings as needed. You might want more salt, pepper, or a pinch more cayenne for heat.
- Stir in the apple cider vinegar or red wine vinegar. This brightens up the flavors, especially after a long simmer.
- Remove the bay leaves before serving.
- Rest (Optional but Recommended):
- If you have the time, turn off the heat and let the chili rest for 20-30 minutes before serving. This allows the flavors to settle and meld even further. Chili is famously even better the next day!
Nutrition
- Serving Size: One Normal Portion
- Calories: 450-550