There are certain recipes that become more than just a set of instructions; they become a part of your family’s story. This Chocolate Mocha Cake is one of those for us. I first baked it on a dreary, rain-soaked Sunday afternoon, hoping to bring a little warmth and cheer into the house. The moment the rich, coffee-infused chocolate aroma began to fill the kitchen, I knew I was onto something special. When I finally presented it, a towering, three-layer masterpiece with silky espresso frosting and a decadent ganache drip, the reaction was pure, unadulterated joy. My husband, a self-proclaimed coffee aficionado, declared it “the best cake he’s ever had,” while the kids were mesmerized by the glossy chocolate drips. It’s the cake we now make for birthdays, for celebrations, or simply for those days when we need a reminder of how sweet life can be. It’s a showstopper in every sense of the word—intensely flavorful, impossibly moist, and an unforgettable experience from the first bite to the last crumb.
The Ultimate Chocolate Mocha Cake Recipe
This recipe is designed to create a deeply flavorful, moist, and structurally sound three-layer 8-inch cake. The key is using high-quality ingredients and paying close attention to the techniques that build texture and flavor.
Ingredients for the Moist Chocolate Mocha Cake
- Flour: 2 ½ cups (300g) all-purpose flour, spooned and leveled
- Sugar: 2 cups (400g) granulated sugar
- Cocoa Powder: ¾ cup (75g) unsweetened Dutch-processed cocoa powder
- Baking Soda: 2 teaspoons
- Baking Powder: 1 teaspoon
- Salt: 1 teaspoon fine sea salt
- Espresso Powder: 2 tablespoons high-quality instant espresso powder
- Eggs: 2 large eggs, at room temperature
- Buttermilk: 1 cup (240ml) full-fat buttermilk, at room temperature
- Vegetable Oil: ½ cup (120ml) neutral oil like canola or vegetable oil
- Vanilla Extract: 2 teaspoons pure vanilla extract
- Hot Coffee: 1 cup (240ml) strongly brewed hot coffee
Ingredients for the Silky Espresso Buttercream
- Unsalted Butter: 1 ½ cups (340g or 3 sticks) unsalted butter, softened to room temperature
- Powdered Sugar: 4 cups (480g) powdered sugar, sifted
- Espresso Powder: 2 tablespoons high-quality instant espresso powder
- Heavy Cream: 3-4 tablespoons heavy cream or whole milk, at room temperature
- Vanilla Extract: 1 teaspoon pure vanilla extract
- Salt: ¼ teaspoon fine sea salt
Ingredients for the Rich Chocolate Ganache Drip
- Semi-Sweet Chocolate: 4 ounces (113g) high-quality semi-sweet chocolate, finely chopped
- Heavy Cream: ½ cup (120ml) heavy cream
Step-by-Step Instructions for a Flawless Cake
Follow these detailed instructions carefully. The process is broken down into three main parts: baking the cake, making the frosting, and the final assembly.
Part 1: Baking the Moist Chocolate Cake Layers
- Preheat and Prepare: Preheat your oven to 350°F (175°C). Grease and flour three 8-inch round cake pans. For extra insurance against sticking, line the bottom of each pan with a circle of parchment paper, then grease and flour the parchment as well.
- Combine Dry Ingredients: In a large mixing bowl, or the bowl of a stand mixer, whisk together the all-purpose flour, granulated sugar, Dutch-processed cocoa powder, baking soda, baking powder, salt, and 2 tablespoons of espresso powder. Sifting these ingredients together is highly recommended to remove any lumps and aerate the mixture, which contributes to a lighter crumb.
- Combine Wet Ingredients: In a separate medium-sized bowl, whisk together the 2 large room-temperature eggs, 1 cup of buttermilk, ½ cup of vegetable oil, and 2 teaspoons of vanilla extract until fully combined and smooth.
- Mix the Batter: Pour the wet ingredients into the dry ingredients. Using a stand mixer fitted with the paddle attachment or a handheld electric mixer, mix on low speed until just combined. Scrape down the sides and bottom of the bowl to ensure everything is incorporated. Be careful not to overmix at this stage; a few streaks of flour are okay.
- Bloom the Cocoa: This is the most important step for an intense chocolate flavor. With the mixer on low, slowly and carefully stream in the 1 cup of hot brewed coffee. The batter will become very thin and liquidy—this is completely normal and is the secret to an incredibly moist cake. Mix until just combined, about 30 seconds. The heat from the coffee “blooms” the cocoa powder, unlocking its deepest, richest flavor notes.
- Divide and Bake: Carefully divide the thin batter evenly among the three prepared cake pans. A kitchen scale is your best friend here for perfectly even layers.
- Bake: Place the pans in the preheated oven and bake for 30-35 minutes, or until a wooden skewer or toothpick inserted into the center of the cakes comes out clean or with a few moist crumbs attached.
- Cool Completely: Remove the cakes from the oven and let them cool in their pans on a wire rack for about 15-20 minutes. Then, carefully invert the cakes onto the wire rack, peel off the parchment paper, and let them cool completely to room temperature. This can take up to 2 hours. Do not attempt to frost a warm cake, as the frosting will melt and slide right off.
Part 2: Whipping Up the Dreamy Espresso Buttercream
- Dissolve the Espresso: In a small bowl, mix the 2 tablespoons of espresso powder with 3 tablespoons of heavy cream. Stir until the espresso powder is fully dissolved. This prevents a grainy texture in your final frosting.
- Cream the Butter: In the bowl of a stand mixer fitted with the paddle attachment (or using a large bowl and a handheld mixer), beat the softened unsalted butter on medium-high speed for about 5-7 minutes. The butter should become very pale, light, and fluffy. This step incorporates air and is crucial for a light, silky buttercream.
- Add Powdered Sugar: With the mixer on low speed, gradually add the sifted powdered sugar, one cup at a time, mixing well after each addition. Once all the sugar is incorporated, scrape down the sides and bottom of the bowl.
- Add Flavor: Pour in the dissolved espresso mixture, the vanilla extract, and the salt.
- Whip to Perfection: Increase the mixer speed to medium-high and beat for another 3-5 minutes until the buttercream is exceptionally smooth, light, and airy. If the frosting is too stiff, add the remaining tablespoon of heavy cream. If it’s too thin, add a bit more powdered sugar.
Part 3: Assembling and Decorating Your Masterpiece
- Level the Cakes (Optional but Recommended): If your cake layers have domed tops, use a long serrated knife to carefully slice off the domes, creating flat, even surfaces for stacking.
- The First Layer: Place one cake layer, top-side down, onto your cake stand or serving plate. Spread a generous layer of espresso buttercream (about 1 cup) evenly over the top, right to the edges.
- Stack and Repeat: Place the second cake layer on top and repeat the process, spreading another cup of buttercream. Top with the third and final cake layer, placing it top-side down to ensure a perfectly flat top surface for the cake.
- The Crumb Coat: Apply a thin, even layer of buttercream over the top and sides of the entire cake. This is called a “crumb coat,” and its purpose is to trap any loose crumbs so they don’t get into your final, beautiful layer of frosting. Use an offset spatula or bench scraper for a smooth finish.
- Chill: Place the crumb-coated cake in the refrigerator for at least 30 minutes (or the freezer for 15 minutes) to allow the frosting to set firmly.
- Final Frosting: Once chilled, apply the remaining buttercream to the top and sides of the cake, creating a smooth, beautiful finish. You can use an offset spatula for a rustic look or a bench scraper for perfectly sharp, smooth sides.
- Prepare the Ganache Drip: Place the finely chopped semi-sweet chocolate in a heatproof bowl. Heat the heavy cream in a small saucepan over medium heat until it just begins to simmer (don’t let it boil). Pour the hot cream directly over the chopped chocolate and let it sit, undisturbed, for 5 minutes. This allows the heat to melt the chocolate gently.
- Stir and Cool: After 5 minutes, stir the mixture with a whisk or spatula, starting from the center and working your way out, until the ganache is completely smooth, glossy, and emulsified. Let the ganache cool at room temperature for about 10-15 minutes, or until it has thickened slightly to the consistency of warm honey. It should be pourable but not hot or watery.
- Apply the Drip: Take your chilled, frosted cake. Using a spoon or a squeeze bottle, carefully pour the ganache around the top edge of the cake, allowing it to drip down the sides naturally. Pour the remaining ganache in the center and use an offset spatula to gently spread it to meet the drips.
- Final Chill: Return the cake to the refrigerator for at least 20-30 minutes to allow the ganache to set before slicing and serving.
Nutrition Facts
- Servings: 16
- Calories per serving (approximate): 650-700 kcal
Disclaimer: The nutritional information provided is an estimate and can vary based on the specific ingredients and brands used.
Preparation Time
- Active Preparation Time: 45 minutes
- Baking Time: 30-35 minutes
- Cooling Time: 2 hours
- Assembly and Chilling Time: 1.5 hours
- Total Time: Approximately 4 hours and 45 minutes
How to Serve Your Chocolate Mocha Cake
This cake is a statement piece on its own, but a few simple additions can elevate it even further.
- At Room Temperature: For the best flavor and texture, this cake should be served at room temperature. The butter in the frosting needs to soften slightly to be perfectly creamy. Remove it from the refrigerator about 30-45 minutes before serving.
- With a Simple Garnish:
- Sprinkle the top with chocolate shavings or a dusting of cocoa powder.
- Place whole chocolate-covered espresso beans on top for a beautiful and thematic garnish.
- Add a few fresh raspberries or strawberries for a pop of color and a touch of tartness to cut through the richness.
- With a Side:
- A Dollop of Cream: Serve each slice with a spoonful of unsweetened or lightly sweetened whipped cream. The light, airy texture is a wonderful contrast to the dense cake.
- Vanilla Bean Ice Cream: A scoop of high-quality vanilla bean ice cream melting alongside a slice is a classic and unbeatable combination.
- A Drizzle of Caramel: For ultimate decadence, drizzle a bit of salted caramel sauce over each slice.
- Beverage Pairings:
- Coffee: The most obvious and perfect pairing. A cup of black coffee or an Americano will complement the cake’s flavors without adding extra sweetness.
- Milk: A cold glass of milk is a simple, comforting pairing that many people adore.
- For Adults: A glass of tawny port, a coffee liqueur like Kahlúa, or a rich, dark stout beer can create a sophisticated and delightful pairing experience.
Additional Tips for Success
- Use Room Temperature Ingredients (Seriously!): This is non-negotiable for a perfect cake. Room temperature eggs, buttermilk, and butter incorporate into the batter and frosting more evenly. It creates a smoother emulsion, which results in a lighter, more tender cake crumb and a silkier, non-curdled buttercream. To quickly bring eggs to room temperature, place them in a bowl of warm water for 10 minutes.
- The Magic of Blooming Cocoa: Do not skip the step of adding hot coffee to the batter. This technique, known as “blooming,” involves hydrating the cocoa powder with a hot liquid. It helps to dissolve the cocoa solids and release the flavor compounds trapped within, resulting in a significantly deeper, richer, and more intense chocolate flavor throughout the cake.
- Don’t Overmix the Batter: Once you combine the wet and dry ingredients, you begin developing gluten in the flour. Mixing just until the ingredients are combined is key. Overmixing will overdevelop the gluten, leading to a tough, dense, and rubbery cake instead of the tender, moist crumb you’re aiming for. The final mix with the hot coffee should be very brief.
- Weigh Your Ingredients for Precision: While cup measurements are provided, using a digital kitchen scale is the most accurate way to bake. It ensures you have the exact right ratio of flour, sugar, and liquids every single time, eliminating variables that can lead to a dry or dense cake. This is the single biggest step you can take to move from a good home baker to a great one.
- A Chilled Cake is a Happy Cake for Decorating: Frosting a completely cool cake is essential, but frosting a chilled cake is even better. The crumb coat and final chilling steps are critical. A cold, firm cake is much easier to handle, provides a stable canvas for smooth frosting application, and ensures that your beautiful ganache drips will set up perfectly instead of melting the buttercream and sliding off.
Frequently Asked Questions (FAQ)
1. Can I use regular brewed coffee instead of espresso powder in the cake and frosting?
For the cake batter, you can substitute the 1 cup of hot water and 2 tbsp of espresso powder with 1 cup of very strong, hot brewed coffee. However, for the frosting, using liquid coffee will thin it out too much and can cause it to break or become watery. Instant espresso powder is highly recommended for the frosting because it provides a concentrated coffee flavor without adding excess liquid. If you must substitute, use a tiny amount of very, very strong, chilled coffee, but be prepared for a slightly different texture.
2. My buttercream looks curdled or broken. How can I fix it?
This usually happens when the butter is too cold or the liquid ingredients are a different temperature. Don’t panic! The fix is usually temperature-related. If it looks curdled, your butter was likely too cold. Take about 1/4 cup of the buttercream, microwave it for 10-15 seconds until it’s melted but not hot, and then whip it back into the remaining frosting. This will help bring the overall temperature up and re-emulsify the mixture. If the frosting is too soft and soupy, your butter was too warm. Place the entire mixing bowl in the refrigerator for 15-20 minutes to chill, then whip it again.
3. Can I make this cake ahead of time?
Absolutely! This cake is perfect for making in advance. You can bake the cake layers up to 2 days ahead. Once they are completely cool, wrap them tightly in plastic wrap and store them at room temperature. You can also make the buttercream up to a week in advance and store it in an airtight container in the refrigerator. Before using, let it come to room temperature and then re-whip it in your mixer for a few minutes to restore its light and fluffy texture. The fully assembled cake can be stored in the refrigerator for up to 3 days.
4. What’s the difference between Dutch-processed and natural cocoa powder, and can I substitute it?
Dutch-processed cocoa powder has been treated with an alkalizing agent to neutralize its acidity. This results in a darker color and a smoother, less bitter flavor. Natural cocoa powder is acidic. This recipe is specifically developed with Dutch-processed cocoa and baking soda/powder. Because baking is a science, substituting natural cocoa would change the chemical reaction with the leaveners and could result in a cake that doesn’t rise properly and has a different taste. For best results, stick with Dutch-processed cocoa powder for this recipe.
5. Can I make this recipe into cupcakes?
Yes, this recipe works wonderfully for cupcakes. It will yield approximately 24-30 standard-sized cupcakes. Line your muffin tins with paper liners and fill them about ⅔ full with batter. Bake at 350°F (175°C) for about 18-22 minutes, or until a toothpick inserted into the center comes out clean. Let them cool completely before frosting. You will have plenty of frosting and ganache to decorate them.
Print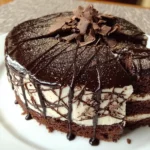
Chocolate Mocha Cake Recipe
Ingredients
Ingredients for the Moist Chocolate Mocha Cake
- Flour: 2 ½ cups (300g) all-purpose flour, spooned and leveled
- Sugar: 2 cups (400g) granulated sugar
- Cocoa Powder: ¾ cup (75g) unsweetened Dutch-processed cocoa powder
- Baking Soda: 2 teaspoons
- Baking Powder: 1 teaspoon
- Salt: 1 teaspoon fine sea salt
- Espresso Powder: 2 tablespoons high-quality instant espresso powder
- Eggs: 2 large eggs, at room temperature
- Buttermilk: 1 cup (240ml) full-fat buttermilk, at room temperature
- Vegetable Oil: ½ cup (120ml) neutral oil like canola or vegetable oil
- Vanilla Extract: 2 teaspoons pure vanilla extract
- Hot Coffee: 1 cup (240ml) strongly brewed hot coffee
Ingredients for the Silky Espresso Buttercream
- Unsalted Butter: 1 ½ cups (340g or 3 sticks) unsalted butter, softened to room temperature
- Powdered Sugar: 4 cups (480g) powdered sugar, sifted
- Espresso Powder: 2 tablespoons high-quality instant espresso powder
- Heavy Cream: 3-4 tablespoons heavy cream or whole milk, at room temperature
- Vanilla Extract: 1 teaspoon pure vanilla extract
- Salt: ¼ teaspoon fine sea salt
Ingredients for the Rich Chocolate Ganache Drip
- Semi-Sweet Chocolate: 4 ounces (113g) high-quality semi-sweet chocolate, finely chopped
- Heavy Cream: ½ cup (120ml) heavy cream
Instructions
Part 1: Baking the Moist Chocolate Cake Layers
- Preheat and Prepare: Preheat your oven to 350°F (175°C). Grease and flour three 8-inch round cake pans. For extra insurance against sticking, line the bottom of each pan with a circle of parchment paper, then grease and flour the parchment as well.
- Combine Dry Ingredients: In a large mixing bowl, or the bowl of a stand mixer, whisk together the all-purpose flour, granulated sugar, Dutch-processed cocoa powder, baking soda, baking powder, salt, and 2 tablespoons of espresso powder. Sifting these ingredients together is highly recommended to remove any lumps and aerate the mixture, which contributes to a lighter crumb.
- Combine Wet Ingredients: In a separate medium-sized bowl, whisk together the 2 large room-temperature eggs, 1 cup of buttermilk, ½ cup of vegetable oil, and 2 teaspoons of vanilla extract until fully combined and smooth.
- Mix the Batter: Pour the wet ingredients into the dry ingredients. Using a stand mixer fitted with the paddle attachment or a handheld electric mixer, mix on low speed until just combined. Scrape down the sides and bottom of the bowl to ensure everything is incorporated. Be careful not to overmix at this stage; a few streaks of flour are okay.
- Bloom the Cocoa: This is the most important step for an intense chocolate flavor. With the mixer on low, slowly and carefully stream in the 1 cup of hot brewed coffee. The batter will become very thin and liquidy—this is completely normal and is the secret to an incredibly moist cake. Mix until just combined, about 30 seconds. The heat from the coffee “blooms” the cocoa powder, unlocking its deepest, richest flavor notes.
- Divide and Bake: Carefully divide the thin batter evenly among the three prepared cake pans. A kitchen scale is your best friend here for perfectly even layers.
- Bake: Place the pans in the preheated oven and bake for 30-35 minutes, or until a wooden skewer or toothpick inserted into the center of the cakes comes out clean or with a few moist crumbs attached.
- Cool Completely: Remove the cakes from the oven and let them cool in their pans on a wire rack for about 15-20 minutes. Then, carefully invert the cakes onto the wire rack, peel off the parchment paper, and let them cool completely to room temperature. This can take up to 2 hours. Do not attempt to frost a warm cake, as the frosting will melt and slide right off.
Part 2: Whipping Up the Dreamy Espresso Buttercream
- Dissolve the Espresso: In a small bowl, mix the 2 tablespoons of espresso powder with 3 tablespoons of heavy cream. Stir until the espresso powder is fully dissolved. This prevents a grainy texture in your final frosting.
- Cream the Butter: In the bowl of a stand mixer fitted with the paddle attachment (or using a large bowl and a handheld mixer), beat the softened unsalted butter on medium-high speed for about 5-7 minutes. The butter should become very pale, light, and fluffy. This step incorporates air and is crucial for a light, silky buttercream.
- Add Powdered Sugar: With the mixer on low speed, gradually add the sifted powdered sugar, one cup at a time, mixing well after each addition. Once all the sugar is incorporated, scrape down the sides and bottom of the bowl.
- Add Flavor: Pour in the dissolved espresso mixture, the vanilla extract, and the salt.
- Whip to Perfection: Increase the mixer speed to medium-high and beat for another 3-5 minutes until the buttercream is exceptionally smooth, light, and airy. If the frosting is too stiff, add the remaining tablespoon of heavy cream. If it’s too thin, add a bit more powdered sugar.
Part 3: Assembling and Decorating Your Masterpiece
- Level the Cakes (Optional but Recommended): If your cake layers have domed tops, use a long serrated knife to carefully slice off the domes, creating flat, even surfaces for stacking.
- The First Layer: Place one cake layer, top-side down, onto your cake stand or serving plate. Spread a generous layer of espresso buttercream (about 1 cup) evenly over the top, right to the edges.
- Stack and Repeat: Place the second cake layer on top and repeat the process, spreading another cup of buttercream. Top with the third and final cake layer, placing it top-side down to ensure a perfectly flat top surface for the cake.
- The Crumb Coat: Apply a thin, even layer of buttercream over the top and sides of the entire cake. This is called a “crumb coat,” and its purpose is to trap any loose crumbs so they don’t get into your final, beautiful layer of frosting. Use an offset spatula or bench scraper for a smooth finish.
- Chill: Place the crumb-coated cake in the refrigerator for at least 30 minutes (or the freezer for 15 minutes) to allow the frosting to set firmly.
- Final Frosting: Once chilled, apply the remaining buttercream to the top and sides of the cake, creating a smooth, beautiful finish. You can use an offset spatula for a rustic look or a bench scraper for perfectly sharp, smooth sides.
- Prepare the Ganache Drip: Place the finely chopped semi-sweet chocolate in a heatproof bowl. Heat the heavy cream in a small saucepan over medium heat until it just begins to simmer (don’t let it boil). Pour the hot cream directly over the chopped chocolate and let it sit, undisturbed, for 5 minutes. This allows the heat to melt the chocolate gently.
- Stir and Cool: After 5 minutes, stir the mixture with a whisk or spatula, starting from the center and working your way out, until the ganache is completely smooth, glossy, and emulsified. Let the ganache cool at room temperature for about 10-15 minutes, or until it has thickened slightly to the consistency of warm honey. It should be pourable but not hot or watery.
- Apply the Drip: Take your chilled, frosted cake. Using a spoon or a squeeze bottle, carefully pour the ganache around the top edge of the cake, allowing it to drip down the sides naturally. Pour the remaining ganache in the center and use an offset spatula to gently spread it to meet the drips.
- Final Chill: Return the cake to the refrigerator for at least 20-30 minutes to allow the ganache to set before slicing and serving.
Nutrition
- Serving Size: One Normal Portion
- Calories: 650-700 kcal