


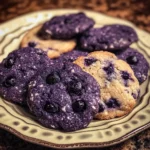
There’s something truly special about pulling a tray of warm, freshly baked cookies from the oven, especially when they’re bursting with juicy blueberries. I still remember the first time I perfected this particular Blueberry Cookie recipe. It was a slightly grey Sunday afternoon, and the whole house quickly filled with the sweet, comforting aroma of butter, sugar, and warm berries. My kids, usually glued to their screens, were drawn to the kitchen like magnets. The moment of truth came when they took their first bites – eyes wide, followed by contented sighs and requests for “just one more.” These cookies became an instant family favorite. They strike that perfect balance: slightly crisp edges giving way to a wonderfully soft, chewy center, studded with plump blueberries that pop with flavor in every bite. They aren’t overly sweet, letting the natural tartness of the berries shine through, complemented by a subtle hint of vanilla. Whether it’s for an after-school treat, a weekend baking project, or a potluck contribution, these Blueberry Cookies have never failed to bring smiles. They are relatively simple to make, yet they taste like they came from a gourmet bakery. This recipe is my go-to, the one I share with friends, and the one that always disappears fastest from the cookie jar. I’m genuinely excited to share it with you, hoping it brings as much joy to your kitchen as it has to mine.
The Ultimate Blueberry Cookies: Ingredients You’ll Need
Crafting the perfect blueberry cookie requires a balance of quality ingredients. Each component plays a crucial role in achieving the desired texture – soft, chewy, with slightly crisp edges – and flavor profile – buttery, sweet, with bursts of tangy blueberry. Below is the detailed list of what you’ll need. We’ll delve deeper into why each ingredient is important and potential substitutions further down.
- Unsalted Butter: 1 cup (2 sticks or 226g), softened to room temperature. Using unsalted butter allows you to control the salt content precisely. Softened butter is key for proper creaming with the sugars, incorporating air for a lighter texture.
- Granulated Sugar: 3/4 cup (150g). Provides sweetness, contributes to spread, and helps create those desirable crisp edges.
- Light Brown Sugar: 1/2 cup (110g), packed. Adds moisture (thanks to molasses), contributes to chewiness, and provides a deeper, slightly caramel flavor note that complements the blueberries beautifully. Packing it ensures you’re using the correct amount.
- Large Eggs: 2. Act as binders, add richness and moisture, and contribute to the structure and leavening of the cookies. Room temperature eggs incorporate better into the batter.
- Pure Vanilla Extract: 2 teaspoons. Enhances all the other flavors in the cookie, adding warmth and depth. Pure extract offers a superior flavor compared to imitation.
- All-Purpose Flour: 3 cups (360g). Provides the main structure for the cookies. Ensure you measure it correctly (spoon and level method is recommended) to avoid dense or dry cookies.
- Baking Soda: 1 teaspoon. The primary leavening agent, reacting with the brown sugar’s acidity to help the cookies rise and spread.
- Salt: 1/2 teaspoon. Balances the sweetness and enhances the overall flavor profile. Even sweet recipes need salt!
- Fresh Blueberries: 1 ½ cups (about 220g). The star of the show! Fresh blueberries provide the best texture and flavor burst. Gently fold them in to avoid crushing them completely. (See notes on using frozen blueberries below).
- Optional: Lemon Zest: Zest of 1 small lemon. This is highly recommended! The bright citrus notes cut through the richness and beautifully complement the blueberry flavor, making the cookies taste even fresher.
A Deeper Look at Key Ingredients:
- The Fats (Butter): Butter is crucial for flavor and texture. Its fat content contributes richness and tenderness. The process of creaming softened butter with sugar incorporates air, which helps leaven the cookies and creates a lighter texture. Using butter that’s too cold will result in improper creaming and potentially denser cookies. Melted butter often leads to flatter, crispier cookies, while overly soft or melted butter can cause excessive spreading. Room temperature (around 65-70°F or 18-21°C) is ideal – it should give slightly when pressed but not be greasy or oily.
- The Sugars (Granulated and Brown): The combination of granulated and brown sugar is key to achieving both crisp edges and a chewy center. Granulated sugar helps the cookies spread and contributes to crispness. Brown sugar, containing molasses, adds moisture, chewiness, and a deeper flavor. The ratio here is designed for a balanced texture. You could alter the ratios, but it will change the final cookie (more brown sugar = chewier and potentially darker; more white sugar = crispier and potentially thinner).
- The Binder (Eggs): Eggs do more than just bind. The yolks add fat and richness, while the whites provide protein for structure and moisture. Using large eggs ensures the correct liquid-to-dry ingredient ratio. Room temperature eggs mix more evenly into the batter, preventing cold spots and ensuring a homogenous dough.
- The Structure (Flour): All-purpose flour provides the necessary gluten development for the cookie’s structure. Over-mixing after adding flour can develop too much gluten, leading to tough cookies. Mix just until the flour streaks disappear. Measuring flour accurately is critical. Scooping directly from the bag compacts the flour, resulting in too much flour being used, which leads to dry, cakey cookies. Spoon the flour into your measuring cup and level it off with a straight edge for the best results.
- The Leavener (Baking Soda): Baking soda (sodium bicarbonate) is an alkaline powder that requires an acid (in this case, from the brown sugar) and moisture to react and produce carbon dioxide gas. This gas creates bubbles that help the cookies rise and spread, contributing to their texture. Ensure your baking soda is fresh for optimal results (check the expiration date).
- The Star (Blueberries): Fresh blueberries are generally preferred for their texture and how they hold their shape. Rinse and gently pat them completely dry before adding them to the batter to prevent excess moisture and color bleeding. If using frozen blueberries, do not thaw them. Tossing them in a tablespoon or two of the measured flour before folding them into the batter can help prevent them from sinking to the bottom and minimize color bleeding. You might need to add an extra minute or two to the baking time if using frozen berries.
- Flavor Enhancers (Vanilla, Salt, Lemon Zest): Vanilla extract adds a complex background note that rounds out the sweetness. Salt is essential for balancing flavors – without it, cookies can taste flat or overly sweet. The optional lemon zest adds a bright, high note that cuts through the richness and makes the blueberry flavor pop. It’s a small addition that makes a significant difference.
Step-by-Step Baking Instructions
Follow these instructions carefully for the best blueberry cookie results. Precision in baking often leads to delicious success!
- Preheat and Prep: Preheat your oven to 375°F (190°C). Line two large baking sheets with parchment paper or silicone baking mats. This prevents sticking and promotes even baking. Set aside.
- Cream Butter and Sugars: In a large mixing bowl, using a stand mixer fitted with the paddle attachment or a hand mixer, beat the softened unsalted butter on medium speed until smooth and creamy (about 1 minute). Add the granulated sugar and packed light brown sugar. Cream together on medium-high speed for 2-3 minutes, until the mixture is light in color and fluffy in texture. Scrape down the sides and bottom of the bowl occasionally to ensure even mixing. This step incorporates air, which is crucial for the cookie’s texture.
- Add Eggs and Vanilla: Add the large eggs one at a time, beating well on medium speed after each addition until fully incorporated. Beat in the pure vanilla extract (and lemon zest, if using). The mixture should look smooth and emulsified.
- Combine Dry Ingredients: In a separate medium bowl, whisk together the all-purpose flour, baking soda, and salt. Whisking ensures the leavening agent and salt are evenly distributed throughout the flour, preventing pockets of saltiness or uneven rising.
- Combine Wet and Dry: Gradually add the dry ingredient mixture to the wet ingredient mixture in the large bowl. Mix on low speed just until the flour streaks are almost gone. Be very careful not to overmix at this stage. Overmixing develops the gluten in the flour too much, resulting in tough cookies. Stop mixing as soon as the flour is incorporated.
- Fold in Blueberries: Gently fold the fresh (or flour-coated frozen) blueberries into the cookie dough using a rubber spatula or wooden spoon. Fold just until the berries are evenly distributed. Try not to crush the berries too much, although some minor breakage and streaking are normal and add character.
- Chill the Dough (Highly Recommended): Cover the bowl with plastic wrap and chill the cookie dough in the refrigerator for at least 30 minutes, or preferably 1 hour. Chilling solidifies the fat (butter) in the dough. This prevents the cookies from spreading too much during baking, resulting in thicker, chewier cookies with better flavor development. Chilled dough is also easier to handle.
- Portion the Dough: Once chilled, drop rounded tablespoons of cookie dough onto the prepared baking sheets, spacing them about 2 inches apart to allow for spreading. A medium cookie scoop (about 1.5 tablespoons) works perfectly for uniform size and shape.
- Bake: Bake in the preheated oven at 375°F (190°C) for 10-13 minutes. The exact time will depend on your oven and the size of your cookies. Bake until the edges are lightly golden brown and the centers look soft and slightly underdone. They will continue to cook slightly on the hot baking sheet after removal. For softer cookies, err on the shorter side of the baking time. For slightly crispier cookies, bake a minute or two longer.
- Cool: Let the cookies cool on the baking sheets for 5-10 minutes. This allows them to set properly. If you try to move them too soon, they might fall apart. After 5-10 minutes, carefully transfer the cookies using a spatula to a wire rack to cool completely. Cooling on a wire rack allows air to circulate, preventing soggy bottoms.
- Enjoy: Serve warm or at room temperature. Store cooled cookies as directed below.
Nutrition Facts (Estimated)
Please note that these values are estimates and can vary based on the specific ingredients used (e.g., brand of flour, size of eggs, exact size of cookies) and portion sizes.
- Servings: This recipe yields approximately 24-30 cookies, depending on the size you make them.
- Calories Per Serving (1 cookie): Approximately 150-190 calories per cookie.
This estimation assumes a yield of 28 cookies. It’s always best to calculate nutritional information based on your specific ingredients and measurements using an online calculator if precise data is required.
Preparation Time Breakdown
Understanding the time commitment helps in planning your baking session.
- Preparation Time: 15-20 minutes (includes measuring ingredients, mixing dough)
- Chill Time: 30-60 minutes (essential for texture and preventing spread)
- Baking Time: 10-13 minutes per batch (allow for multiple batches if needed)
- Cooling Time: 15-20 minutes
- Total Time: Approximately 1 hour 10 minutes to 1 hour 55 minutes (including chilling and cooling)
The hands-on time is relatively short (around 30-35 minutes), with the chilling time being passive.
How to Serve Your Delicious Blueberry Cookies
These versatile cookies are delightful on their own, but here are some ways to elevate the experience or serve them for different occasions:
- Classic Comfort:
- Serve slightly warm with a tall glass of cold milk. The ultimate classic pairing!
- Enjoy with a cup of hot coffee or tea for a perfect afternoon pick-me-up or morning treat.
- Dessert Enhancements:
- Serve alongside a scoop of high-quality vanilla bean ice cream. The contrast between the warm, chewy cookie and the cold, creamy ice cream is divine.
- Crumble cooled cookies over yogurt or smoothie bowls for a textured, flavorful topping.
- Create mini ice cream sandwiches by placing a small scoop of ice cream between two cookies.
- For Gatherings and Gifting:
- Arrange them attractively on a platter for parties, potlucks, or bake sales. Their vibrant blueberry specks make them visually appealing.
- Package them in cellophane bags tied with ribbon or in decorative cookie tins for thoughtful homemade gifts.
- Include them as part of a dessert board alongside other sweets, fruits, and cheeses.
- Flavor Pairings:
- Dust cooled cookies lightly with powdered sugar for an elegant touch.
- If you love the lemon-blueberry combination, consider drizzling cooled cookies with a simple lemon glaze (powdered sugar mixed with a little lemon juice).
- Pair with a dollop of lemon curd or whipped cream on the side for dipping.
Additional Tips for Blueberry Cookie Perfection
Achieving cookie nirvana often lies in the small details. Here are five extra tips to ensure your blueberry cookies turn out perfectly every time:
- Don’t Overmix the Dough: This is arguably the most crucial tip for soft, tender cookies. Once you add the flour mixture to the wet ingredients, mix only until the flour is just combined. Streaks of flour are okay; they’ll incorporate when you fold in the blueberries. Overmixing develops too much gluten, leading to tough, dense, or overly cakey cookies instead of soft and chewy ones. Use the lowest speed on your mixer or switch to a spatula for the final incorporation.
- Master the Blueberry Fold-In: Be gentle when adding the blueberries! Use a rubber spatula or wooden spoon and a folding motion (scraping down the side, across the bottom, and folding over the top) rather than vigorous stirring. This helps prevent crushing the berries excessively and staining the dough grey or purple. A few streaks are fine and look pretty, but pulverized berries can make the dough too wet. If using frozen berries, tossing them in 1-2 tablespoons of the measured flour before folding helps absorb excess moisture and prevents excessive bleeding.
- Embrace the Chill: Don’t skip the chilling step! Chilling the dough for at least 30-60 minutes (or even longer – up to 24 hours for more developed flavor) makes a significant difference. It solidifies the butter, which slows down spreading in the oven, leading to thicker, chewier cookies. Chilled dough also concentrates the flavors. If you’re short on time, even 15-20 minutes in the freezer can help, but 30-60 minutes in the fridge is ideal.
- Watch for Visual Cues When Baking: Oven temperatures can vary, so rely on visual cues more than just the timer. Bake until the edges are set and lightly golden brown. The centers should still look slightly soft and puffy, perhaps even a little underdone. They will finish cooking from the residual heat on the baking sheet after you remove them from the oven. Overbaking is the enemy of soft, chewy cookies – it leads to dry, hard results.
- Proper Storage is Key: To maintain that perfect soft and chewy texture, store the completely cooled cookies in an airtight container at room temperature. They are best enjoyed within 3-4 days. Adding a slice of sandwich bread to the container can help keep them soft for longer, as the cookies will absorb moisture from the bread. Avoid storing them in the refrigerator, as this can actually make them stale faster. For longer storage, freeze the baked cookies or the portioned dough balls (see FAQ).
Frequently Asked Questions (FAQ) About Blueberry Cookies
Here are answers to some common questions you might have about making these delightful treats:
- Q: Can I use frozen blueberries instead of fresh?
- A: Yes, you absolutely can use frozen blueberries! The key is not to thaw them before adding them to the dough. Thawing releases excess moisture, which can make the dough too wet and cause excessive color bleeding. To minimize bleeding and prevent the berries from sinking, toss the frozen blueberries with 1-2 tablespoons of the measured flour from the recipe before gently folding them into the finished dough. You might need to add 1-2 minutes to the baking time as the frozen berries will cool down the dough slightly.
- Q: Why did my cookies spread too much and become flat?
- A: Several factors can cause excessive spreading:
- Butter too soft/melted: Ensure your butter is softened to room temperature, not melted or overly soft and greasy.
- Skipping the chill time: Chilling the dough is crucial for controlling spread. The colder the dough, the less it will spread before setting.
- Over-creaming: While creaming incorporates air, excessive creaming can sometimes incorporate too much air, weakening the structure. Stick to the recommended 2-3 minutes.
- Baking sheet too warm: Ensure your baking sheets are cool before placing dough on them. If baking multiple batches, let the sheets cool down between batches or use multiple sets.
- Greased baking sheet: Parchment paper or a silicone mat is better than greasing, which encourages spreading.
- A: Several factors can cause excessive spreading:
- Q: Can I make the cookie dough ahead of time?
- A: Yes! This dough is great for making ahead. You can prepare the dough, cover it tightly with plastic wrap (press the wrap directly onto the surface of the dough to prevent drying), and refrigerate it for up to 3 days. Chilling actually deepens the flavor. When ready to bake, let the dough sit at room temperature for about 15-20 minutes to make it slightly easier to scoop, then portion and bake as directed (you might need an extra minute in the oven if the dough is very cold). You can also freeze portioned dough balls (see next question).
- Q: How do I store leftover cookies? How long do they last? Can I freeze them?
- A: Store completely cooled cookies in an airtight container at room temperature for 3-4 days for optimal freshness and softness. Adding a piece of bread can help maintain softness. Avoid refrigeration.
- Freezing Baked Cookies: Place cooled cookies in a single layer on a baking sheet and freeze until solid (about 1 hour). Then, transfer them to a freezer-safe zip-top bag or airtight container. They can be frozen for up to 2-3 months. Thaw at room temperature.
- Freezing Dough Balls: Portion the dough onto a parchment-lined baking sheet. Freeze until solid (1-2 hours). Transfer the frozen dough balls to a freezer-safe zip-top bag. You can bake them directly from frozen – just add 2-3 minutes to the original baking time. This is perfect for baking just a few fresh cookies whenever the craving strikes!
- Q: Can I add other mix-ins like white chocolate or nuts?
- A: Absolutely! This recipe is a great base for variations. Here are some ideas:
- White Chocolate Blueberry Cookies: Fold in 1 cup of white chocolate chips along with the blueberries. The creamy sweetness pairs wonderfully.
- Lemon White Chocolate Blueberry: Add both the lemon zest (increase to zest of 1 large lemon) and 1 cup of white chocolate chips.
- Nutty Blueberry Cookies: Fold in 1/2 to 3/4 cup of chopped walnuts or pecans for added texture and nutty flavor. Toasted nuts offer even more flavor.
- Oatmeal Blueberry Cookies: You could potentially replace a small portion of the flour (e.g., 1/2 cup) with rolled oats for a different texture, but this would require adjusting the recipe slightly more carefully to maintain moisture balance. Start with small substitutions if experimenting.
- A: Absolutely! This recipe is a great base for variations. Here are some ideas:
Blueberry Cookie Recipe
Ingredients
- Unsalted Butter: 1 cup (2 sticks or 226g), softened to room temperature. Using unsalted butter allows you to control the salt content precisely. Softened butter is key for proper creaming with the sugars, incorporating air for a lighter texture.
- Granulated Sugar: 3/4 cup (150g). Provides sweetness, contributes to spread, and helps create those desirable crisp edges.
- Light Brown Sugar: 1/2 cup (110g), packed. Adds moisture (thanks to molasses), contributes to chewiness, and provides a deeper, slightly caramel flavor note that complements the blueberries beautifully. Packing it ensures you’re using the correct amount.
- Large Eggs: 2. Act as binders, add richness and moisture, and contribute to the structure and leavening of the cookies. Room temperature eggs incorporate better into the batter.
- Pure Vanilla Extract: 2 teaspoons. Enhances all the other flavors in the cookie, adding warmth and depth. Pure extract offers a superior flavor compared to imitation.
- All-Purpose Flour: 3 cups (360g). Provides the main structure for the cookies. Ensure you measure it correctly (spoon and level method is recommended) to avoid dense or dry cookies.
- Baking Soda: 1 teaspoon. The primary leavening agent, reacting with the brown sugar’s acidity to help the cookies rise and spread.
- Salt: 1/2 teaspoon. Balances the sweetness and enhances the overall flavor profile. Even sweet recipes need salt!
- Fresh Blueberries: 1 ½ cups (about 220g). The star of the show! Fresh blueberries provide the best texture and flavor burst. Gently fold them in to avoid crushing them completely. (See notes on using frozen blueberries below).
- Optional: Lemon Zest: Zest of 1 small lemon. This is highly recommended! The bright citrus notes cut through the richness and beautifully complement the blueberry flavor, making the cookies taste even fresher.
Instructions
- Preheat and Prep: Preheat your oven to 375°F (190°C). Line two large baking sheets with parchment paper or silicone baking mats. This prevents sticking and promotes even baking. Set aside.
- Cream Butter and Sugars: In a large mixing bowl, using a stand mixer fitted with the paddle attachment or a hand mixer, beat the softened unsalted butter on medium speed until smooth and creamy (about 1 minute). Add the granulated sugar and packed light brown sugar. Cream together on medium-high speed for 2-3 minutes, until the mixture is light in color and fluffy in texture. Scrape down the sides and bottom of the bowl occasionally to ensure even mixing. This step incorporates air, which is crucial for the cookie’s texture.
- Add Eggs and Vanilla: Add the large eggs one at a time, beating well on medium speed after each addition until fully incorporated. Beat in the pure vanilla extract (and lemon zest, if using). The mixture should look smooth and emulsified.
- Combine Dry Ingredients: In a separate medium bowl, whisk together the all-purpose flour, baking soda, and salt. Whisking ensures the leavening agent and salt are evenly distributed throughout the flour, preventing pockets of saltiness or uneven rising.
- Combine Wet and Dry: Gradually add the dry ingredient mixture to the wet ingredient mixture in the large bowl. Mix on low speed just until the flour streaks are almost gone. Be very careful not to overmix at this stage. Overmixing develops the gluten in the flour too much, resulting in tough cookies. Stop mixing as soon as the flour is incorporated.
- Fold in Blueberries: Gently fold the fresh (or flour-coated frozen) blueberries into the cookie dough using a rubber spatula or wooden spoon. Fold just until the berries are evenly distributed. Try not to crush the berries too much, although some minor breakage and streaking are normal and add character.
- Chill the Dough (Highly Recommended): Cover the bowl with plastic wrap and chill the cookie dough in the refrigerator for at least 30 minutes, or preferably 1 hour. Chilling solidifies the fat (butter) in the dough. This prevents the cookies from spreading too much during baking, resulting in thicker, chewier cookies with better flavor development. Chilled dough is also easier to handle.
- Portion the Dough: Once chilled, drop rounded tablespoons of cookie dough onto the prepared baking sheets, spacing them about 2 inches apart to allow for spreading. A medium cookie scoop (about 1.5 tablespoons) works perfectly for uniform size and shape.
- Bake: Bake in the preheated oven at 375°F (190°C) for 10-13 minutes. The exact time will depend on your oven and the size of your cookies. Bake until the edges are lightly golden brown and the centers look soft and slightly underdone. They will continue to cook slightly on the hot baking sheet after removal. For softer cookies, err on the shorter side of the baking time. For slightly crispier cookies, bake a minute or two longer.
- Cool: Let the cookies cool on the baking sheets for 5-10 minutes. This allows them to set properly. If you try to move them too soon, they might fall apart. After 5-10 minutes, carefully transfer the cookies using a spatula to a wire rack to cool completely. Cooling on a wire rack allows air to circulate, preventing soggy bottoms.
- Enjoy: Serve warm or at room temperature. Store cooled cookies as directed below.
Nutrition
- Serving Size: One Normal Portion
- Calories: 150-190


