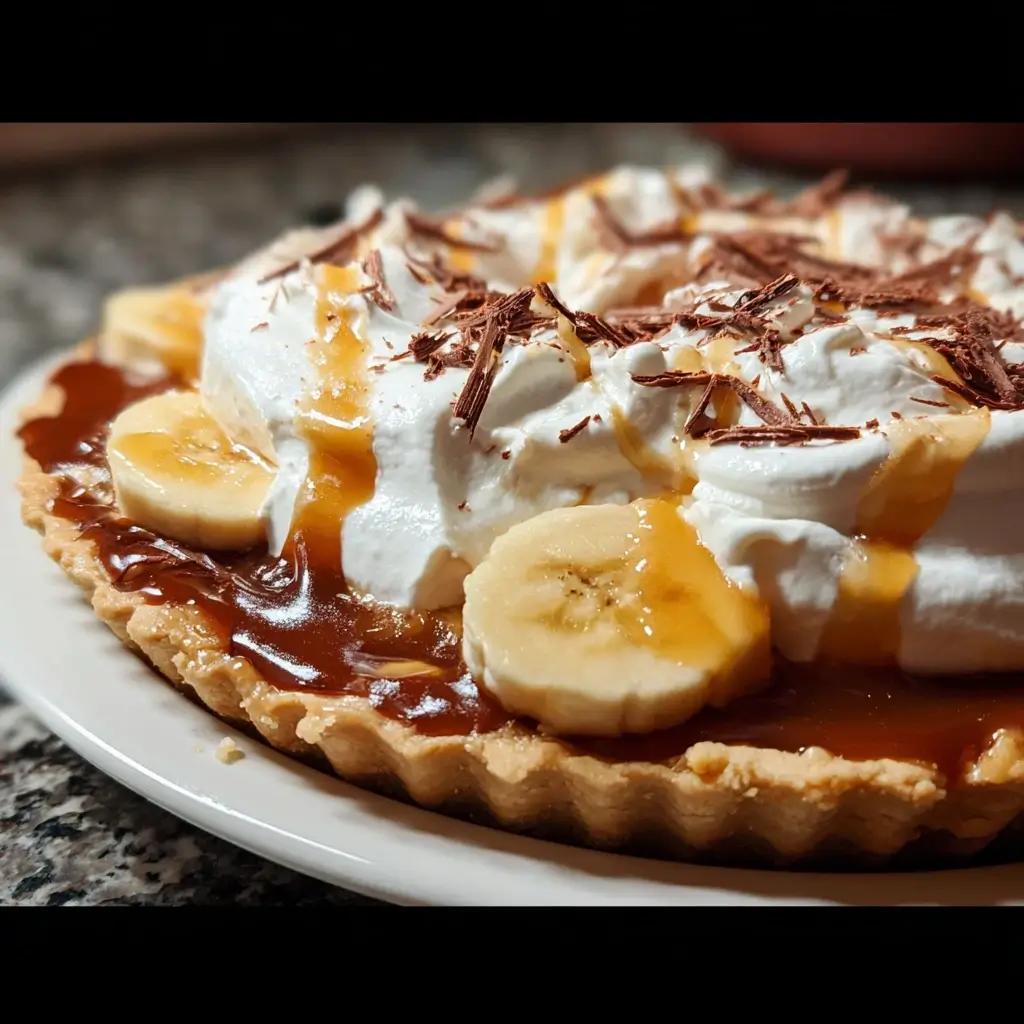

Of all the desserts that have graced my family’s table, none elicit quite the same gasps of delight as this Easy Banoffee Pie. I remember the first time I made it for a Sunday get-together. I was looking for something impressive but didn’t have the energy for a complex, multi-day baking project. This recipe, with its no-bake crust and sinfully simple layers, seemed too good to be true. As I brought it out, the silence that fell over the room was quickly replaced by a chorus of “oohs” and “aahs.” My nephew, who usually turns his nose up at anything with fruit, devoured his slice and sheepishly asked for another. It was a triumph. This pie isn’t just a dessert; it’s an experience. It’s the buttery crunch of the biscuit base, the deep, luxurious sweetness of the thick caramel, the fresh, fruity burst of ripe bananas, and the light, airy cloud of freshly whipped cream. It’s a symphony of textures and flavors that feels incredibly decadent, yet is shockingly simple to assemble. This is the recipe that has made me a dessert hero in my home, the one I turn to for celebrations, potlucks, or just a Tuesday that needs a little sparkle. It’s my fail-safe, crowd-pleasing, guaranteed-to-disappear secret weapon, and I’m thrilled to share it with you.
A Sweet History: What Exactly is Banoffee Pie?
Before we dive into the mixing bowls, let’s appreciate the genius behind this creation. Banoffee Pie is a quintessentially British dessert, born in the 1970s at The Hungry Monk Restaurant in East Sussex, England. The name itself is a glorious portmanteau of its two star ingredients: “banana” and “toffee.” The original recipe, developed by owner Nigel Mackenzie and his chef, Ian Dowding, involved boiling an unopened can of sweetened condensed milk for several hours to create a soft, thick toffee, which we now widely know and love as dulce de leche.
This dessert’s charm lies in its simplicity and the perfect marriage of its components. It’s a testament to the fact that you don’t need complicated techniques or exotic ingredients to create something truly unforgettable. Its popularity exploded, and it quickly became a staple in pubs, cafes, and homes across the UK and eventually, the world. Our version honors the spirit of the original while streamlining the process to make it accessible for even the most novice of home bakers.
Why This is the Ultimate Easy Banoffee Pie Recipe
The word “easy” gets thrown around a lot, but this recipe truly earns the title. Here’s why it’s the perfect starting point for beginners and a reliable favorite for seasoned bakers:
- No-Bake, No-Fuss Crust: We’re skipping the oven entirely. A simple mixture of crushed biscuits and melted butter creates a firm, flavorful, and perfectly textured base that sets beautifully in the refrigerator. No pastry-making, no blind baking, no risk of a soggy bottom.
- The Caramel Shortcut: While boiling a can of condensed milk is the traditional method, using a high-quality, pre-made dulce de leche is a game-changing shortcut. It delivers that authentic, deep caramel flavor without the time and potential hazard of the boiling process. We’ll still give you the classic method in the FAQ if you’re feeling adventurous!
- Simple Assembly: This pie is all about layering. There are no complex techniques involved. If you can crush a biscuit, spread caramel, slice a banana, and whip cream, you can master this pie on your very first try. The result is a dessert that looks like it came from a professional patisserie.
The Ultimate Easy Banoffee Pie Recipe
This recipe yields one 9-inch (23cm) pie, which will generously serve 8-10 people.
Ingredients You’ll Need
For the Buttery Biscuit Crust:
- 250g (about 8.8 oz) Digestive Biscuits: These are the classic choice. Their slightly savory, wheaty flavor perfectly balances the sweetness of the filling. Graham crackers or Biscoff cookies are excellent alternatives.
- 125g (1/2 cup + 1 tbsp) Unsalted Butter, melted: Using unsalted butter allows you to control the saltiness of the final crust.
For the Rich Caramel Layer:
- 1 can (397g / 14 oz) Dulce de Leche or Thick Caramel: We highly recommend using a thick, spreadable dulce de leche for the best flavor and texture. Nestlé Carnation Caramel is a widely available and reliable option.
For the Fresh Banana Layer:
- 3-4 Large, Ripe Bananas: Look for bananas that are yellow with a few brown spots. They should be sweet and firm, not mushy.
- 1 tsp Lemon Juice (optional): A little squeeze of lemon juice tossed with the banana slices helps prevent them from browning too quickly.
For the Creamy Topping:
- 400ml (1 2/3 cups) Heavy Whipping Cream, chilled: The cream must be very cold to whip up properly into stable, stiff peaks.
- 2 tbsp Icing Sugar (Confectioners’ Sugar): This adds a touch of sweetness and helps stabilize the cream.
- 1 tsp Vanilla Extract: Enhances the flavor of the cream and complements the other layers beautifully.
- High-Quality Chocolate Bar or Cocoa Powder, for garnish: A final flourish of grated dark chocolate or a dusting of cocoa powder adds a touch of elegance and a hint of bitterness to cut through the richness.
Step-by-Step Instructions for Banoffee Perfection
Follow these detailed steps to assemble your show-stopping dessert. We’ll break it down by layer to make it completely foolproof.
Step 1: Prepare the Perfect No-Bake Crust
- Crush the Biscuits: Place the Digestive biscuits into a food processor and pulse until they resemble fine breadcrumbs or sand. If you don’t have a food processor, place the biscuits in a large, sealed ziplock bag. Lay the bag flat and use a rolling pin or a heavy-bottomed pan to crush them until you achieve a fine, even crumb. Ensure there are no large lumps left.
- Combine with Butter: Transfer the biscuit crumbs to a medium-sized mixing bowl. Pour the melted unsalted butter over the crumbs. Using a spatula or fork, mix thoroughly until all the crumbs are evenly coated in butter. The mixture should feel like wet sand.
- Press into the Pan: Tip the buttery crumb mixture into a 9-inch (23cm) loose-bottomed tart pan or a springform pan. First, use the back of a spoon or the bottom of a measuring cup to press the crumbs firmly and evenly across the base. Then, work the crumbs up the sides of the pan, pressing firmly to create a solid, even wall. A flat-bottomed glass can be very helpful for this.
- Chill the Crust: Place the pan in the refrigerator for at least 30 minutes (or in the freezer for 15 minutes if you’re short on time). This step is crucial. Chilling the crust solidifies the butter, creating a firm base that won’t crumble when you add the filling or slice the pie.
Step 2: Create the Luscious Caramel Layer
- Spread the Caramel: Once the crust is chilled and firm, retrieve it from the refrigerator. Open your can of dulce de leche or caramel. Spoon the entire contents onto the center of the biscuit base.
- Even it Out: Using an offset spatula or the back of a spoon, gently spread the caramel in a thick, even layer, covering the entire base. Be careful not to disturb the biscuit crust as you spread.
Step 3: Add the Fresh Banana Layer
- Prepare the Bananas: Peel and slice your ripe bananas into rounds about 1/4-inch (1/2 cm) thick. If you’re concerned about them browning, place the slices in a bowl and gently toss them with the teaspoon of lemon juice. This is especially recommended if you’re not serving the pie immediately.
- Arrange the Slices: Arrange the banana slices in a single, slightly overlapping layer on top of the caramel. You can create a decorative concentric circle pattern or simply ensure the caramel is completely covered. Use enough bananas to create a generous layer.
Step 4: Whip Up the Cloud-Like Cream Topping
- Whip the Cream: In a large, chilled mixing bowl, pour in the very cold heavy whipping cream. Using an electric hand mixer or a stand mixer with a whisk attachment, begin whipping on medium speed.
- Add Sugar and Vanilla: Once the cream starts to thicken and form soft peaks (when you lift the beaters, a peak forms but flops over), add the icing sugar and vanilla extract.
- Whip to Stiff Peaks: Continue whipping on medium-high speed until the cream is thick, voluminous, and forms stiff peaks. This means when you lift the beaters, the peak holds its shape without collapsing. Be careful not to over-whip, or the cream will start to turn grainy and buttery.
- Top the Pie: Spoon the whipped cream over the banana layer. You can either spread it evenly with a spatula for a smooth finish or create beautiful, rustic swirls and peaks with the back of a spoon for a more dramatic effect.
Step 5: The Final Flourish and Chilling
- Garnish: Using a vegetable peeler or a fine grater, shave curls of dark chocolate over the top of the cream. Alternatively, you can use a small sieve to dust the top with a light, even layer of cocoa powder.
- Chill Before Serving: For the best results, return the assembled pie to the refrigerator to chill for at least 1-2 hours before serving. This allows the flavors to meld together and ensures the pie is firm enough to slice cleanly.
Nutrition Facts
- Servings: 8-10 slices
- Calories per serving (approximate): 450-550 kcal
Disclaimer: The nutritional information provided is an estimate and can vary based on the specific ingredients and brands used.
Preparation Time
- Active Time: 25 minutes
- Chilling Time: 2 hours 30 minutes (minimum)
- Total Time: 2 hours 55 minutes
How to Serve Your Banoffee Masterpiece
Presentation elevates this simple pie into a show-stopper. Here’s how to serve it for maximum impact:
- Slicing is an Art:
- For the cleanest slices, use a long, sharp knife.
- Dip the knife in hot water and wipe it clean between each cut. This prevents the cream and caramel from smearing and gives you beautiful, well-defined layers in every slice.
- If using a loose-bottomed tart pan, place it on a can or jar and gently push the sides down to release the pie before slicing.
- Plating and Garnishes:
- Serve each slice on its own dessert plate.
- For an extra touch of indulgence, drizzle a little extra caramel sauce or chocolate sauce on the plate before placing the slice on top.
- A few fresh mint leaves next to the pie can add a pop of color and a hint of freshness.
- A light dusting of powdered sugar over the chocolate shavings can create a beautiful contrast.
- Perfect Pairings:
- Coffee: The slight bitterness of a freshly brewed Americano, espresso, or a frothy cappuccino cuts through the pie’s richness perfectly.
- Tea: A strong cup of English Breakfast or Earl Grey tea is a classic British pairing.
- Dessert Wine: A sweet Riesling or a glass of bubbly Prosecco can complement the dessert beautifully.
- For the Kids (and Kids at Heart): A cold glass of milk is a simple but divine accompaniment.
5 Additional Tips for Banoffee Perfection
Take your pie from great to absolutely flawless with these expert tips.
- The Secret to a Rock-Solid Crust: The most common issue with a no-bake crust is that it crumbles when sliced. The key is pressure. When you’re pressing the crumbs into the pan, use more force than you think you need. The flat bottom of a heavy glass is your best tool. Press down firmly on the base and then use the side of the glass to press the crumbs tightly against the wall of the pan. The second key is chilling—don’t skip or shorten the initial 30-minute chill time.
- Mastering the Whipped Cream: For cream that holds its shape for hours, start with cold everything. Place your mixing bowl and whisk attachments in the freezer for 10-15 minutes before you start. Use heavy whipping cream with a high-fat content (at least 35%) and ensure it’s straight from the coldest part of your fridge. Whipping on medium speed incorporates air more stably than blasting it on high from the start.
- Elevate Your Biscuit Base: While Digestive biscuits are traditional, don’t be afraid to experiment. Biscoff (speculoos) cookies will give your crust a warm, spiced flavor. Chocolate bourbon biscuits create a dark, rich base. For a classic American twist, graham crackers work wonderfully. You can even add a tablespoon of sugar or a pinch of cinnamon to the crumb mixture for extra flavor.
- The Make-Ahead Strategy: You can absolutely prepare parts of this pie in advance. The biscuit crust can be made and kept in the fridge, well-covered, for up to 2 days. You can assemble the crust and caramel layer a day ahead. However, for the best result, always add the bananas and cream on the day of serving. Bananas will brown and release water, and the cream is at its best when fresh.
- Caramel Consistency is Key: If your store-bought caramel or dulce de leche seems a bit thin, you can thicken it slightly. Pour it into a small saucepan and heat it gently over low heat, stirring constantly for a few minutes until it thickens to your desired consistency. Let it cool completely before spreading it on your crust to avoid melting the butter in the base.
Frequently Asked Questions (FAQ)
1. What’s the difference between caramel and dulce de leche, and which is better for Banoffee Pie?
While often used interchangeably, they are technically different. Classic caramel is made by melting and caramelizing sugar, often with butter and cream added. Dulce de leche (Spanish for “sweet of milk”) is made by slowly heating sweetened milk or sweetened condensed milk, which causes the sugars in the milk to caramelize, resulting in a deeper, richer, and creamier flavor. For Banoffee Pie, dulce de leche is highly recommended as its thick, fudgy texture and complex milky-caramel flavor are a perfect match for the bananas and cream.
2. How do I stop my bananas from turning brown?
The enemy of fresh bananas is oxidation. As soon as they are cut and exposed to air, they begin to brown. The best way to slow this process is with acid. Tossing the banana slices in a small amount of lemon or lime juice will significantly delay browning without noticeably affecting the taste. Another key is to cover them completely with the whipped cream layer, which creates a barrier from the air.
3. How long does Banoffee Pie last in the fridge? Can I make it a day ahead?
Banoffee Pie is best enjoyed within 24-48 hours of assembly. While you can make it a day ahead, be aware that the biscuit base may soften slightly as it absorbs moisture from the caramel, and the bananas may start to weep. For optimal texture and freshness, assemble it on the morning of the day you plan to serve it. Always store it, covered, in the refrigerator.
4. Can I freeze Banoffee Pie?
Unfortunately, Banoffee Pie does not freeze well. The freezing and thawing process dramatically alters the textures. The bananas become unpleasantly mushy, and the whipped cream can separate and become watery. This is one dessert that is definitely best made fresh.
5. How can I make my own dulce de leche from condensed milk?
If you want to try the traditional method, it’s simple but requires patience. Oven Method (Safest): Preheat your oven to 425°F (220°C). Pour one can of sweetened condensed milk into a 9-inch pie dish or a small baking dish. Cover it tightly with aluminum foil. Place this dish inside a larger roasting pan and fill the roasting pan with hot water until it comes halfway up the sides of the pie dish. Bake for 1.5 to 2 hours, checking the water level occasionally and topping it up if needed. The longer you bake it, the darker and thicker it will become. Remove it from the oven, let it cool, and then whisk until smooth. Warning: Never boil an unopened can of condensed milk directly on the stovetop, as there is a risk of it exploding under pressure. The oven method is much safer and more controlled.
Print
Banoffee Pie Recipe
Ingredients
For the Buttery Biscuit Crust:
- 250g (about 8.8 oz) Digestive Biscuits: These are the classic choice. Their slightly savory, wheaty flavor perfectly balances the sweetness of the filling. Graham crackers or Biscoff cookies are excellent alternatives.
- 125g (1/2 cup + 1 tbsp) Unsalted Butter, melted: Using unsalted butter allows you to control the saltiness of the final crust.
For the Rich Caramel Layer:
- 1 can (397g / 14 oz) Dulce de Leche or Thick Caramel: We highly recommend using a thick, spreadable dulce de leche for the best flavor and texture. Nestlé Carnation Caramel is a widely available and reliable option.
For the Fresh Banana Layer:
- 3–4 Large, Ripe Bananas: Look for bananas that are yellow with a few brown spots. They should be sweet and firm, not mushy.
- 1 tsp Lemon Juice (optional): A little squeeze of lemon juice tossed with the banana slices helps prevent them from browning too quickly.
For the Creamy Topping:
- 400ml (1 2/3 cups) Heavy Whipping Cream, chilled: The cream must be very cold to whip up properly into stable, stiff peaks.
- 2 tbsp Icing Sugar (Confectioners’ Sugar): This adds a touch of sweetness and helps stabilize the cream.
- 1 tsp Vanilla Extract: Enhances the flavor of the cream and complements the other layers beautifully.
- High-Quality Chocolate Bar or Cocoa Powder, for garnish: A final flourish of grated dark chocolate or a dusting of cocoa powder adds a touch of elegance and a hint of bitterness to cut through the richness.
Instructions
Step 1: Prepare the Perfect No-Bake Crust
- Crush the Biscuits: Place the Digestive biscuits into a food processor and pulse until they resemble fine breadcrumbs or sand. If you don’t have a food processor, place the biscuits in a large, sealed ziplock bag. Lay the bag flat and use a rolling pin or a heavy-bottomed pan to crush them until you achieve a fine, even crumb. Ensure there are no large lumps left.
- Combine with Butter: Transfer the biscuit crumbs to a medium-sized mixing bowl. Pour the melted unsalted butter over the crumbs. Using a spatula or fork, mix thoroughly until all the crumbs are evenly coated in butter. The mixture should feel like wet sand.
- Press into the Pan: Tip the buttery crumb mixture into a 9-inch (23cm) loose-bottomed tart pan or a springform pan. First, use the back of a spoon or the bottom of a measuring cup to press the crumbs firmly and evenly across the base. Then, work the crumbs up the sides of the pan, pressing firmly to create a solid, even wall. A flat-bottomed glass can be very helpful for this.
- Chill the Crust: Place the pan in the refrigerator for at least 30 minutes (or in the freezer for 15 minutes if you’re short on time). This step is crucial. Chilling the crust solidifies the butter, creating a firm base that won’t crumble when you add the filling or slice the pie.
Step 2: Create the Luscious Caramel Layer
- Spread the Caramel: Once the crust is chilled and firm, retrieve it from the refrigerator. Open your can of dulce de leche or caramel. Spoon the entire contents onto the center of the biscuit base.
- Even it Out: Using an offset spatula or the back of a spoon, gently spread the caramel in a thick, even layer, covering the entire base. Be careful not to disturb the biscuit crust as you spread.
Step 3: Add the Fresh Banana Layer
- Prepare the Bananas: Peel and slice your ripe bananas into rounds about 1/4-inch (1/2 cm) thick. If you’re concerned about them browning, place the slices in a bowl and gently toss them with the teaspoon of lemon juice. This is especially recommended if you’re not serving the pie immediately.
- Arrange the Slices: Arrange the banana slices in a single, slightly overlapping layer on top of the caramel. You can create a decorative concentric circle pattern or simply ensure the caramel is completely covered. Use enough bananas to create a generous layer.
Step 4: Whip Up the Cloud-Like Cream Topping
- Whip the Cream: In a large, chilled mixing bowl, pour in the very cold heavy whipping cream. Using an electric hand mixer or a stand mixer with a whisk attachment, begin whipping on medium speed.
- Add Sugar and Vanilla: Once the cream starts to thicken and form soft peaks (when you lift the beaters, a peak forms but flops over), add the icing sugar and vanilla extract.
- Whip to Stiff Peaks: Continue whipping on medium-high speed until the cream is thick, voluminous, and forms stiff peaks. This means when you lift the beaters, the peak holds its shape without collapsing. Be careful not to over-whip, or the cream will start to turn grainy and buttery.
- Top the Pie: Spoon the whipped cream over the banana layer. You can either spread it evenly with a spatula for a smooth finish or create beautiful, rustic swirls and peaks with the back of a spoon for a more dramatic effect.
Step 5: The Final Flourish and Chilling
- Garnish: Using a vegetable peeler or a fine grater, shave curls of dark chocolate over the top of the cream. Alternatively, you can use a small sieve to dust the top with a light, even layer of cocoa powder.
- Chill Before Serving: For the best results, return the assembled pie to the refrigerator to chill for at least 1-2 hours before serving. This allows the flavors to meld together and ensures the pie is firm enough to slice cleanly.
Nutrition
- Serving Size: One Normal Portion
- Calories: 450-550 kcal