


Mornings in our household used to be a chaotic scramble. Between getting kids ready for school and myself ready for work, a nutritious breakfast often fell by the wayside, replaced by a quick (and often sugary) cereal or, dare I say, sometimes nothing at all. I knew we needed a change, something wholesome, easy to grab, and appealing to everyone. That’s when I stumbled upon the idea of combining the goodness of bananas and quinoa into a breakfast bar. The first batch was a revelation! My kids, usually suspicious of anything overtly “healthy,” devoured them. My husband, who needs sustained energy for his long days, found them perfectly satisfying. And I? I finally had a guilt-free, delicious, and incredibly convenient breakfast solution that I could prep on a Sunday for the entire week. These Banana Quinoa Breakfast Bars have truly transformed our mornings, bringing a sense of calm and a boost of wholesome energy. They are soft, chewy, naturally sweet, and packed with goodness – a far cry from the processed bars lining supermarket shelves.
Why These Banana Quinoa Breakfast Bars Will Revolutionize Your Mornings
In a world that moves at lightning speed, starting your day right is more crucial than ever. These Banana Quinoa Breakfast Bars aren’t just another recipe; they’re a lifestyle upgrade. They offer a powerhouse of nutrition, convenience, and deliciousness, making them an ideal choice for busy individuals, health-conscious families, and anyone looking to inject some wholesome goodness into their daily routine.
The magic lies in the synergistic combination of their core ingredients.
- Bananas: Beyond their delightful natural sweetness that reduces the need for refined sugars, ripe bananas provide essential potassium, vitamin B6, and vitamin C. They also contribute to the bars’ moist, chewy texture.
- Quinoa: This ancient grain is a nutritional superstar. It’s a complete protein, meaning it contains all nine essential amino acids, which is rare for plant-based foods. It’s also rich in fiber, iron, magnesium, and antioxidants. Cooked quinoa adds a wonderful, slightly nutty texture to the bars.
- Oats: Rolled oats are a breakfast staple for a reason. They are packed with soluble fiber, particularly beta-glucan, which is known for its cholesterol-lowering effects and its ability to promote satiety, keeping you feeling full and energized for longer.
Together, these ingredients create a bar that’s not only satisfyingly filling but also provides sustained energy release, preventing those mid-morning slumps. They are perfect for meal prepping – bake a batch on the weekend, and you have a healthy grab-and-go breakfast or snack sorted for the week. Plus, they are incredibly versatile and customizable, allowing you to cater to different dietary needs and taste preferences.
The Unsung Hero: Quinoa in Your Breakfast
Often relegated to savory side dishes or salads, quinoa is a surprisingly versatile ingredient that deserves a prominent place in your breakfast repertoire. Its mild, nutty flavor blends seamlessly into sweeter applications like these breakfast bars, while its nutritional profile significantly elevates any morning meal.
Incorporating cooked quinoa into breakfast bars offers several advantages:
- Texture Boost: It adds a delightful, slightly chewy, and subtly “poppy” texture that distinguishes these bars from standard oat-based versions.
- Nutritional Powerhouse: As mentioned, quinoa’s complete protein content is a significant benefit, especially for vegetarians and vegans, or anyone looking to increase their protein intake without relying on animal products. The fiber aids digestion and promotes gut health.
- Satiety: The combination of protein and fiber in quinoa helps you feel fuller for longer, curbing unhealthy cravings and supporting weight management goals.
To get the best results when using quinoa in these bars, ensure it’s cooked properly – fluffy and not mushy. Rinsing the quinoa thoroughly before cooking helps remove any residual saponins, which can impart a bitter taste. Once cooked, allow it to cool completely before incorporating it into the batter. This prevents it from making the mixture too gummy.
Choosing Your Ingredients: The Foundation of Flavor and Nutrition
The quality of your Banana Quinoa Breakfast Bars hinges significantly on the ingredients you choose. Each component plays a role in the final taste, texture, and nutritional value.
- Bananas – The Riper, The Better: For maximum natural sweetness and easy mashing, use very ripe bananas – the kind with plenty of brown spots on the peel. These bananas are higher in sugar content (natural fruit sugars, of course!) and have a more intense banana flavor, reducing the need for added sweeteners.
- Oats – Rolled for Texture: Rolled oats (also known as old-fashioned oats) are ideal for these bars. They provide a chewy texture and hold their shape well during baking. Quick oats can be used in a pinch, but they will result in a slightly softer, less textured bar. Steel-cut oats are not recommended as they require a much longer cooking time and will not soften sufficiently.
- Quinoa – Cooked to Perfection: Use any variety of quinoa – white, red, or black, or a tricolor blend. The key is that it’s cooked until tender and fluffy, and then cooled. Leftover cooked quinoa is perfect for this recipe!
- Sweeteners – Natural Choices: While ripe bananas provide a good base of sweetness, a little extra often enhances the flavor. Maple syrup is an excellent choice for its rich flavor and liquid consistency, which aids in binding. Honey or agave nectar are also good alternatives. If you prefer, you can use date paste or even a bit of brown sugar, but adjust liquid accordingly if using a dry sweetener.
- Binders – Eggs or Vegan Alternatives: One large egg helps bind the ingredients together. For a vegan version, a “flax egg” (1 tablespoon ground flaxseed mixed with 3 tablespoons water, left to sit for 5-10 minutes until gelatinous) works wonderfully. Chia eggs (1 tablespoon chia seeds + 3 tablespoons water) are another option.
- Fats – Flavor and Moisture: A healthy fat source adds moisture and richness. Melted coconut oil is a popular choice for its subtle flavor. Light olive oil or another neutral-flavored oil can also be used. Nut butter, such as almond butter, peanut butter, or sunflower seed butter (for a nut-free option), not only adds fat but also contributes protein and a delicious nutty flavor.
- Flavor Enhancers – The Supporting Cast: Vanilla extract and ground cinnamon are classic additions that complement the banana and oats beautifully. A pinch of salt enhances all the other flavors.
- Add-Ins – Get Creative!: This is where you can truly personalize your bars.
- Chocolate Chips: Dark, semi-sweet, or milk chocolate chips are always a hit.
- Nuts: Chopped walnuts, pecans, almonds, or cashews add crunch and healthy fats.
- Seeds: Pumpkin seeds, sunflower seeds, chia seeds, or hemp seeds boost nutrition and texture.
- Dried Fruit: Raisins, cranberries, chopped apricots, or dates add chewiness and sweetness.
- Spices: Nutmeg, cardamom, or ginger can add warmth and complexity.
- Coconut: Unsweetened shredded or desiccated coconut lends a lovely tropical note.
Ingredients for Banana Quinoa Breakfast Bars
Here’s what you’ll need to create these wholesome treats:
- 2 medium-large very ripe bananas (about 1 to 1 ¼ cups mashed)
- 1 cup cooked quinoa, cooled (from about ⅓ cup uncooked quinoa)
- 1 ½ cups rolled oats (old-fashioned oats, use certified gluten-free if needed)
- ⅓ cup maple syrup (or honey, agave)
- ¼ cup nut butter (almond, peanut, or sunflower seed butter for nut-free)
- 1 large egg (or 1 flax egg: 1 tbsp ground flaxseed + 3 tbsp water)
- 1 teaspoon vanilla extract
- 1 teaspoon ground cinnamon
- ½ teaspoon baking powder (optional, for a slightly lighter texture)
- ¼ teaspoon salt
- ½ cup add-ins of choice (e.g., chocolate chips, chopped nuts, seeds, dried fruit)
Step-by-Step Instructions to Bake Your Bars
Follow these simple steps to bake a batch of delicious and healthy breakfast bars:
- Preheat and Prep: Preheat your oven to 350°F (175°C). Grease and line an 8×8 inch (20×20 cm) square baking pan with parchment paper, leaving an overhang on two sides to easily lift the bars out later.
- Mash Bananas: In a large mixing bowl, thoroughly mash the ripe bananas with a fork until mostly smooth. A few small lumps are okay.
- Add Wet Ingredients: To the mashed bananas, add the cooked quinoa, maple syrup, nut butter, egg (or flax egg), and vanilla extract. Mix well until everything is thoroughly combined.
- Combine Dry Ingredients: In a separate medium bowl, whisk together the rolled oats, cinnamon, baking powder (if using), and salt.
- Mix Wet and Dry: Add the dry ingredients to the wet ingredients. Stir with a spatula or wooden spoon until just combined. Be careful not to overmix; overmixing can lead to tougher bars.
- Fold in Add-Ins: Gently fold in your chosen add-ins (chocolate chips, nuts, etc.) until evenly distributed throughout the batter.
- Transfer to Pan: Pour the mixture into the prepared baking pan. Spread it evenly using the back of a spoon or an offset spatula. Press the mixture down firmly and evenly. This is crucial for ensuring the bars hold together well after baking.
- Bake: Bake for 25-30 minutes, or until the edges are golden brown and a toothpick inserted into the center comes out clean (or with a few moist crumbs, but not wet batter).
- Cool Completely: This is a very important step! Allow the bars to cool completely in the pan on a wire rack for at least 30-45 minutes, or even longer. They will firm up significantly as they cool. Attempting to cut them while warm will likely result in crumbly bars.
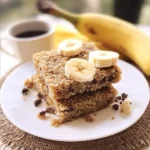
- Cut and Serve: Once completely cooled, use the parchment paper overhang to lift the block of bars out of the pan. Place it on a cutting board and cut into desired sizes (e.g., 12 squares or 8 larger bars).
Nutrition Facts
- Servings: This recipe makes approximately 12 standard-sized bars (if cut into a 3×4 grid in an 8×8 inch pan).
- Calories per serving (approximate): Around 150-180 calories per bar.
Disclaimer: Nutritional information is an estimate and will vary depending on the exact ingredients used, especially the type and amount of nut butter, sweetener, and add-ins.
These bars are a good source of fiber, complex carbohydrates for sustained energy, and plant-based protein (especially if using nut butter and certain seeds).
Preparation Time
- Prep Time: 15-20 minutes (includes mashing bananas, mixing ingredients)
- Cook Time: 25-30 minutes
- Cooling Time: At least 30-45 minutes (crucial for firm bars)
- Total Time: Approximately 1 hour 10 minutes to 1 hour 35 minutes (including cooling)
How to Serve Your Delicious Banana Quinoa Breakfast Bars
These bars are wonderfully versatile and can be enjoyed in numerous ways, making them suitable for various occasions and preferences:
- As Is, On-the-Go:
- The most straightforward way! Grab a bar for a quick breakfast as you dash out the door.
- Pack them in lunchboxes for kids or adults.
- Keep one in your bag for a healthy snack to combat afternoon slumps.
- With a Warm Beverage:
- Enjoy a bar alongside your morning coffee, tea, or a glass of milk (dairy or plant-based). The warmth complements the slightly sweet, oaty flavor.
- Dressed Up for a More Substantial Meal:
- Yogurt Parfait: Crumble a bar over a bowl of Greek yogurt or plant-based yogurt. Add fresh berries or sliced banana for an extra nutritional punch and visual appeal.
- Smoothie Bowl Topping: Use crumbled pieces as a crunchy, wholesome topping for your favorite smoothie bowl.
- With Extra Fruit: Serve alongside a portion of fresh fruit salad for a more rounded breakfast.
- Warmed Up:
- Briefly microwave a bar for 10-15 seconds for a warm, comforting treat, especially on cooler mornings. This makes the chocolate chips (if used) a little melty and gooey!
- As a Pre- or Post-Workout Snack:
- The combination of complex carbohydrates from oats and quinoa, along with protein (especially if nut butter is included), makes these bars an excellent choice for fueling workouts or aiding recovery.
- Dessert Alternative:
- If you’ve added chocolate chips, they can satisfy a sweet craving in a healthier way than many traditional desserts. A small drizzle of melted dark chocolate on top after cooling can elevate them further.
Storage and Make-Ahead Magic
One of the best things about these Banana Quinoa Breakfast Bars is their suitability for meal prepping. Proper storage ensures they stay fresh and delicious:
- Room Temperature: Once completely cooled and cut, store the bars in an airtight container at room temperature for up to 3-4 days. If your kitchen is very warm or humid, they might last better in the fridge.
- Refrigerator: For longer freshness, or if you live in a warm climate, store the bars in an airtight container in the refrigerator for up to a week. They might become slightly firmer when chilled. You can let them sit at room temperature for a few minutes before eating or warm them slightly.
- Freezer (for long-term storage): These bars freeze beautifully!
- Individual Wrapping: For best results, wrap each bar individually in plastic wrap or beeswax wrap.
- Container: Place the individually wrapped bars in a freezer-safe airtight container or a zip-top freezer bag.
- Label and Date: Don’t forget to label the container with the name and date.
- Storage Duration: They can be stored in the freezer for up to 2-3 months.
- Thawing: To thaw, simply take out a bar and let it sit at room temperature for about 30-60 minutes, or thaw overnight in the refrigerator. You can also microwave a frozen bar for about 20-30 seconds if you’re in a hurry.
Making a double batch and freezing half is a fantastic way to ensure you always have a healthy, homemade snack on hand.
Additional Tips for Breakfast Bar Perfection
Unlock the full potential of your Banana Quinoa Breakfast Bars with these five expert tips:
- Don’t Overmix the Batter: Once you combine the wet and dry ingredients, mix only until they are just incorporated. Overmixing can develop the gluten in any trace flour present (even in oats) or simply lead to a denser, tougher bar. A gentle hand ensures a tender, chewy texture.
- Press Firmly into the Pan: This is a critical step often overlooked. After spreading the mixture into your prepared pan, use the back of a spoon, an offset spatula, or even your clean, slightly damp hands to press the mixture down very firmly and evenly. This compaction helps the bars hold together after baking and cutting, preventing them from being too crumbly.
- Cool Completely Before Cutting: Patience is a virtue here! The bars continue to set and firm up as they cool. If you try to cut them while still warm, they will likely fall apart. Allow them to cool in the pan on a wire rack for at least 30-45 minutes, or even longer, until they are no longer warm to the touch. For extra firm bars, you can even chill them in the refrigerator for 20-30 minutes before cutting.
- Toast Your Nuts and Seeds: If you’re adding nuts (like walnuts, pecans, almonds) or seeds (like pumpkin or sunflower seeds), consider toasting them lightly before incorporating them into the batter. Toasting enhances their nutty flavor and adds an extra layer of crunch. Simply spread them on a baking sheet and toast in a 350°F (175°C) oven for 5-8 minutes, or until fragrant, then let them cool before chopping and adding.
- Customize with Spices and Zest: Don’t be afraid to experiment beyond cinnamon. A pinch of nutmeg, cardamom, allspice, or even a little orange or lemon zest can add a wonderful new dimension of flavor to your bars. Start with small amounts (e.g., ¼ teaspoon) and adjust to your liking in future batches.
Troubleshooting Common Issues
Even with the best recipes, sometimes things don’t go exactly as planned. Here are some common issues and how to troubleshoot them:
- Issue: Bars are too crumbly.
- Possible Causes: Not enough binder (egg/flax egg, nut butter, mashed banana), not pressed firmly enough into the pan before baking, or cut while still too warm. Too many dry ingredients or not enough wet ones.
- Solutions: Ensure your banana measurement is accurate (use more if your bananas were small). Make sure your egg or flax egg is properly prepared. Press the mixture very firmly into the pan. Always cool completely before cutting. Next time, you could slightly increase the nut butter or add an extra tablespoon of maple syrup.
- Issue: Bars are too moist or gummy in the center.
- Possible Causes: Underbaked, too much mashed banana or liquid sweetener, or quinoa was still wet when added.
- Solutions: Ensure bars are baked until the edges are golden and a toothpick comes out clean or with dry crumbs. If they seem underdone, you can return them to the oven for another 5-10 minutes (cover with foil if browning too quickly). Measure bananas and liquid sweeteners accurately. Ensure cooked quinoa is well-drained and cooled.
- Issue: Bars stick to the pan.
- Possible Cause: Pan was not adequately greased or lined.
- Solution: Always line your baking pan with parchment paper, leaving an overhang on at least two sides. This creates a “sling” to easily lift the entire block of bars out once cooled, making cutting much easier and preventing sticking. Lightly greasing the pan before adding the parchment can help the parchment stay in place.
- Issue: Flavor is a bit bland.
- Possible Causes: Bananas weren’t ripe enough, not enough salt, or could benefit from more spices/flavorings.
- Solutions: Use very ripe, spotty bananas for maximum sweetness and flavor. Don’t skip the salt – it enhances all other flavors. Be generous with vanilla and cinnamon, or experiment with other spices like nutmeg or cardamom. The quality of your add-ins (e.g., flavorful chocolate chips or toasted nuts) also makes a big difference.
- Issue: Bars are too dense or tough.
- Possible Cause: Overmixing the batter after combining wet and dry ingredients.
- Solution: Mix only until the ingredients are just combined. A few streaks of dry ingredients are okay; they’ll incorporate as you spread the batter.
Frequently Asked Questions (FAQ)
Q1: Can I make these Banana Quinoa Breakfast Bars vegan?
A1: Absolutely! To make them vegan, simply replace the large egg with a “flax egg.” To do this, mix 1 tablespoon of ground flaxseed with 3 tablespoons of water. Let it sit for 5-10 minutes until it becomes gelatinous, then use it as you would the regular egg. Also, ensure your maple syrup is pure and your chocolate chips (if using) are dairy-free.
Q2: Are these breakfast bars gluten-free?
A2: Yes, they can easily be made gluten-free. Quinoa and bananas are naturally gluten-free. The main ingredient to watch is the oats. While oats themselves don’t contain gluten, they are often processed in facilities that also handle wheat, barley, and rye, leading to cross-contamination. To ensure they are truly gluten-free, use certified gluten-free rolled oats. All other standard ingredients (maple syrup, nut butter, spices) are typically gluten-free, but always check labels if you have celiac disease or severe gluten sensitivity.
Q3: How long do Banana Quinoa Breakfast Bars last?
A3: When stored properly in an airtight container, they will last for about 3-4 days at room temperature. If you store them in the refrigerator, they can last for up to a week. For longer storage, you can freeze them for up to 2-3 months. (See “Storage and Make-Ahead Magic” section for freezing instructions).
Q4: Can I use a different fruit instead of bananas?
A4: While bananas provide crucial moisture, binding, and sweetness, you could experiment, though the recipe would need adjustments. Unsweetened applesauce (about ¾ to 1 cup to replace the mashed banana) could work as a moisture and binding agent, but you might need to increase the sweetener slightly as applesauce is less sweet than ripe bananas. The texture and flavor profile will change significantly. For best results with this specific recipe, ripe bananas are highly recommended.
Q5: Can I reduce the amount of sweetener in the recipe?
A5: Yes, you can reduce the maple syrup (or other liquid sweetener). The riper your bananas, the less added sweetener you’ll need. You could try reducing it by 1-2 tablespoons. However, keep in mind that the liquid sweetener also contributes to the binding and moisture of the bars. If you reduce it too much, the bars might be drier or more crumbly. Taste the batter (if not using raw egg) to gauge sweetness before baking. You can also rely more on sweet add-ins like dates or sweet chocolate chips if reducing the main sweetener.
Banana Quinoa Breakfast Bars Recipe
Ingredients
- 2 medium-large very ripe bananas (about 1 to 1 ¼ cups mashed)
- 1 cup cooked quinoa, cooled (from about ⅓ cup uncooked quinoa)
- 1 ½ cups rolled oats (old-fashioned oats, use certified gluten-free if needed)
- ⅓ cup maple syrup (or honey, agave)
- ¼ cup nut butter (almond, peanut, or sunflower seed butter for nut-free)
- 1 large egg (or 1 flax egg: 1 tbsp ground flaxseed + 3 tbsp water)
- 1 teaspoon vanilla extract
- 1 teaspoon ground cinnamon
- ½ teaspoon baking powder (optional, for a slightly lighter texture)
- ¼ teaspoon salt
- ½ cup add-ins of choice (e.g., chocolate chips, chopped nuts, seeds, dried fruit)
Instructions
- Preheat and Prep: Preheat your oven to 350°F (175°C). Grease and line an 8×8 inch (20×20 cm) square baking pan with parchment paper, leaving an overhang on two sides to easily lift the bars out later.
- Mash Bananas: In a large mixing bowl, thoroughly mash the ripe bananas with a fork until mostly smooth. A few small lumps are okay.
- Add Wet Ingredients: To the mashed bananas, add the cooked quinoa, maple syrup, nut butter, egg (or flax egg), and vanilla extract. Mix well until everything is thoroughly combined.
- Combine Dry Ingredients: In a separate medium bowl, whisk together the rolled oats, cinnamon, baking powder (if using), and salt.
- Mix Wet and Dry: Add the dry ingredients to the wet ingredients. Stir with a spatula or wooden spoon until just combined. Be careful not to overmix; overmixing can lead to tougher bars.
- Fold in Add-Ins: Gently fold in your chosen add-ins (chocolate chips, nuts, etc.) until evenly distributed throughout the batter.
- Transfer to Pan: Pour the mixture into the prepared baking pan. Spread it evenly using the back of a spoon or an offset spatula. Press the mixture down firmly and evenly. This is crucial for ensuring the bars hold together well after baking.
- Bake: Bake for 25-30 minutes, or until the edges are golden brown and a toothpick inserted into the center comes out clean (or with a few moist crumbs, but not wet batter).
- Cool Completely: This is a very important step! Allow the bars to cool completely in the pan on a wire rack for at least 30-45 minutes, or even longer. They will firm up significantly as they cool. Attempting to cut them while warm will likely result in crumbly bars.
- Cut and Serve: Once completely cooled, use the parchment paper overhang to lift the block of bars out of the pan. Place it on a cutting board and cut into desired sizes (e.g., 12 squares or 8 larger bars).
Nutrition
- Serving Size: One Normal Portion
- Calories: 150-180


