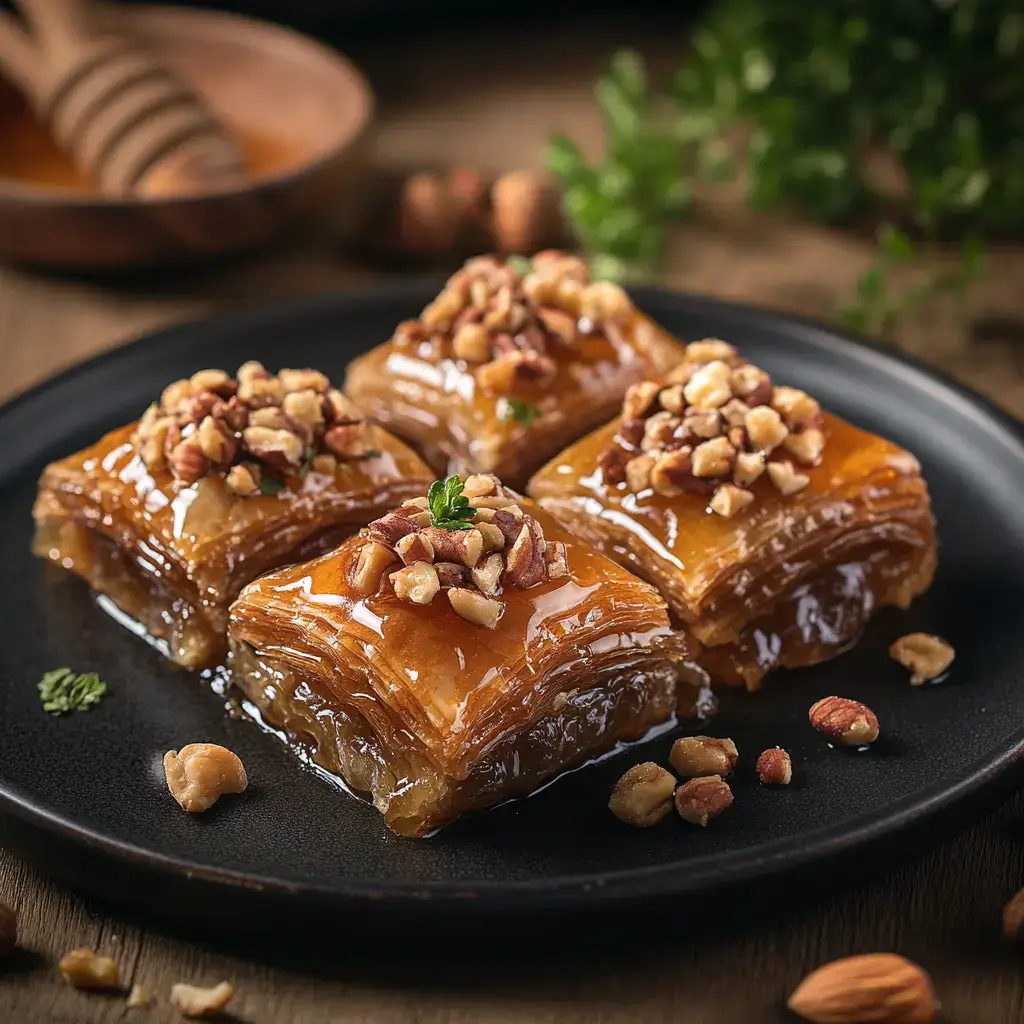
Baklava, a tantalizing dessert with roots in the Middle East, has captured the hearts and palates of food lovers worldwide. This layered pastry, filled with a delightful mixture of nuts and sweetened with honey, offers a perfect balance of textures and flavors. Whether you’re a seasoned baker or a novice in the kitchen, crafting baklava can be a rewarding experience. In this comprehensive guide, we delve into everything you need to know to create your own baklava with honey and nuts, from its rich history to step-by-step instructions.
Ingredients: The Building Blocks of Baklava
Creating a memorable baklava begins with the right ingredients. Each component plays a crucial role in delivering the ultimate taste and texture. Here’s what you’ll need:
- 1 package phyllo dough (16 oz)
- 1 cup melted butter
- 2 cups mixed nuts (walnuts, almonds, pistachios, chopped)
- 1 teaspoon ground cinnamon
- 1 cup honey
- 1/2 cup sugar
- 1 cup water
- 1 teaspoon vanilla extract
These ingredients come together to form a dish that’s not just a treat for the taste buds but also a feast for the senses.
Instructions: Crafting the Perfect Baklava
Creating baklava is as much an art as it is a science. Follow these steps to ensure your baklava is as delicious as it is beautiful.
Step 1: Preparation
- Preheat the Oven: Set your oven to 350°F (175°C) to ensure it’s ready when you are.
- Prepare the Nut Mixture: In a bowl, combine the chopped nuts with ground cinnamon. Set this mixture aside for layering.
Step 2: Layering the Phyllo
- Prepare the Baking Dish: Brush a 9×13 inch baking dish generously with melted butter to prevent sticking.
- Layer the Phyllo Dough: Lay down six sheets of phyllo dough, brushing each with melted butter. This helps create the flaky, crispy layers baklava is known for.
- Add the Nut Mixture: Sprinkle 1/4 of the nut mixture evenly over the phyllo.
Step 3: Repeating the Layers
- Continue Layering: Repeat the layering process—five more sheets of phyllo with butter, followed by the nut mixture—until all ingredients are used. Finish with six sheets of phyllo, each brushed with butter.
Step 4: Baking
- Cut the Baklava: Using a sharp knife, cut the layered dish into diamond shapes. This allows the honey syrup to penetrate the layers during baking.
- Bake: Place in the oven and bake for 30-35 minutes until the top is golden and crisp.
Step 5: Preparing the Honey Syrup
- Make the Syrup: In a saucepan, combine honey, sugar, water, and vanilla extract. Bring to a boil and let simmer for 10 minutes. This syrup is the sweet heart of the baklava.
Step 6: Finishing Touches
- Pour the Syrup Over: As soon as the baklava comes out of the oven, pour the hot syrup evenly over it. The sizzle and aroma are a sensory delight.
- Cool and Serve: Allow the baklava to cool completely before serving. This gives the syrup time to soak into every layer.
Nutrition Facts: A Sweet Indulgence
Baklava is a treat to be enjoyed in moderation. Here’s a breakdown of the nutritional content per serving (approximately 24 servings):
- Calories: 150
- Protein: 2g
- Carbohydrates: 18g
- Fat: 8g
- Sugar: 6g
While baklava is calorie-dense, its richness means a little goes a long way, making it perfect for special occasions.
How to Serve: Elevating Your Baklava Experience
Baklava, with its rich layers of flaky pastry, sweet syrup, and a delightful blend of nuts, is a dessert that deserves to be savored to the fullest. Traditionally served at room temperature, it is often enjoyed as a sweet finale to a meal or paired with beverages such as coffee or tea. However, there are many ways to elevate your baklava experience, making it not just a dessert but a culinary delight that tantalizes the senses. Here are some serving suggestions that will enhance your baklava enjoyment:
1. With a Scoop of Ice Cream
One of the most indulgent ways to serve baklava is by pairing it with a scoop of ice cream. The creamy texture and cold temperature of the ice cream create a delightful contrast to the warm, flaky layers of baklava.
- Flavor Pairings: Vanilla ice cream is a classic choice, as its subtle flavor allows the rich notes of the baklava to shine through. Alternatively, pistachio ice cream enhances the nutty flavors already present in the baklava, creating a harmonious taste experience. For a more adventurous pairing, consider honey or rosewater-flavored ice cream, which can add an intriguing twist.
- Serving Tip: To create a visually appealing dish, serve a piece of baklava on a dessert plate with a generous scoop of ice cream on the side. Drizzle a little of the baklava syrup over the ice cream for added sweetness and a touch of elegance. Garnish with crushed nuts or a sprinkle of cinnamon for an extra flair.
2. Paired with Fresh Fruit
Adding fresh fruit to your baklava presentation not only enhances its visual appeal but also introduces a refreshing element that balances the dessert’s sweetness.
- Fruit Suggestions: The tartness of fresh berries—such as raspberries, strawberries, or blueberries—can provide a delightful contrast to the rich, syrupy baklava. Citrus fruits like oranges or grapefruits bring a zesty brightness that complements the flavors beautifully.
- Serving Tip: Create a vibrant fruit salad with a mix of seasonal berries and citrus segments, lightly tossed with a drizzle of honey or a squeeze of lemon juice. Serve the baklava alongside a small bowl of this fresh fruit medley. This combination not only enhances the flavor profile but also adds a refreshing touch that cleanses the palate between bites.
3. Drizzled with Chocolate
For chocolate lovers, adding a drizzle of melted chocolate to baklava can elevate it to a new level of decadence. The bitterness of dark chocolate perfectly balances the sweetness of the baklava, creating a rich, indulgent experience.
- Chocolate Varieties: Dark chocolate is the preferred choice due to its robust flavor that complements the sweet and nutty notes of baklava. However, for those who enjoy a sweeter profile, milk chocolate can also be used. For an exotic twist, consider using white chocolate infused with spices like cardamom or cinnamon.
- Serving Tip: After the baklava has cooled, melt your chosen chocolate and use a fork or piping bag to drizzle it over the pieces. Let the chocolate set slightly before serving. For added texture, sprinkle with finely chopped nuts or a dusting of cocoa powder. This not only enhances the flavor but also creates an eye-catching presentation.
4. With a Side of Sweetened Yogurt
Another delightful way to serve baklava is with a side of sweetened yogurt. This combination introduces a creamy, tangy element that contrasts beautifully with the sweet, syrupy baklava.
- Yogurt Variations: Use Greek yogurt for a thicker consistency, and sweeten it with honey or maple syrup to enhance the flavor. You can also add a sprinkle of ground cinnamon or a touch of vanilla extract for extra depth.
- Serving Tip: Serve a dollop of sweetened yogurt in a small bowl next to a piece of baklava. This allows guests to dip or spread the yogurt on the baklava, creating a unique flavor combination that is both refreshing and satisfying.
5. Accompanied by Coffee or Tea
Lastly, baklava is traditionally enjoyed with coffee or tea, and this pairing can truly elevate your dessert experience.
- Beverage Pairings: A strong cup of Turkish coffee, with its rich flavor and slight bitterness, complements the sweetness of baklava perfectly. Alternatively, a fragrant cup of herbal tea, such as mint or chamomile, can provide a soothing contrast. For a more adventurous pairing, consider serving baklava with a spiced chai tea, where the warmth of spices enhances the flavors of the dessert.
- Serving Tip: Create a dessert platter that includes a piece of baklava alongside a small cup of your chosen beverage. Provide a small plate for guests to enjoy while sipping their drink. This not only makes for a delightful treat but also encourages conversation and sharing, enhancing the overall dining experience.
Conclusion
By incorporating these serving suggestions, you can transform a simple piece of baklava into a memorable culinary event. Whether enjoyed alone or accompanied by complementary flavors, these enhancements will elevate your baklava experience, making it a true celebration of taste and texture. So gather your friends and family, and indulge in the luxurious world of baklava, where each bite promises to be a delightful journey of flavors.
Additional Tips: Mastering the Art of Baklava
Creating baklava can seem daunting, but with these tips, you’ll be crafting perfect pastries in no time. Baklava, a beloved pastry known for its flaky layers and rich syrup, requires attention to detail and a few key techniques to achieve that quintessential taste and texture. Here are some comprehensive tips to elevate your baklava-making skills.
Keep Phyllo Dough Covered
Phyllo dough is notoriously delicate and can dry out quickly if not handled properly. To prevent this, always keep the phyllo sheets covered with a damp cloth while you are working with them. This not only maintains the dough’s pliability but also ensures that it remains manageable for layering. When you remove a sheet of phyllo, immediately cover the remaining sheets to shield them from the air. If you find that the edges of your phyllo are starting to dry out, you can lightly mist them with water using a spray bottle. This can help keep the dough flexible without making it soggy.
Use High-Quality Honey
The syrup is one of the most critical components of baklava, and the flavor profile largely depends on the quality of the honey used. Choose a high-quality, aromatic honey — like wildflower, clover, or orange blossom — as these varieties offer a depth of flavor that enhances the overall taste of the baklava. Avoid using overly processed or mass-produced honey, as they often lack the complex flavors and aromas that can elevate your dish. Additionally, consider incorporating a splash of citrus juice, such as lemon or orange, into your syrup to balance the sweetness and add a refreshing note.
Let It Rest
One of the most crucial steps in achieving the perfect baklava is allowing it to rest after baking. It might be tempting to dive in right after it comes out of the oven, but letting the baklava sit overnight is essential. This resting period allows the syrup to fully penetrate the layers of phyllo and nuts, enhancing both the flavor and texture. Ideally, allow the baklava to cool completely at room temperature before drizzling the warm syrup over it. Cover the baklava loosely with foil or parchment paper to prevent it from drying out during this resting period. The result will be a beautifully cohesive pastry where each layer is infused with sweetness.
Choose the Right Nuts
The choice of nuts is another vital aspect of baklava. While walnuts and pistachios are traditional favorites, feel free to experiment with other nuts such as almonds or hazelnuts for unique flavor profiles. Toasting the nuts lightly before chopping them can intensify their flavor and add a delightful crunch to your baklava. Make sure to finely chop the nuts, but avoid turning them into a powder; you want a textured filling that still retains some bite.
Be Generous with Butter
Butter is key to achieving that flaky, golden-brown layer that baklava is known for. Use unsalted butter for the best flavor and control over the saltiness of your dish. When layering the phyllo sheets, be generous with the melted butter — brush each sheet thoroughly before adding the next. This technique not only adds richness but also helps create that signature flaky texture. Consider using a combination of melted butter and a little bit of oil, as the oil can help reduce the risk of burning while still providing the necessary moisture.
Cut Before Baking
Cutting the baklava before baking is a crucial step that should not be overlooked. Use a sharp knife to cut the baklava into diamond or square shapes, ensuring that you cut through all the layers down to the bottom of the pan. This allows the syrup to flow into the cuts more effectively, ensuring that every piece is infused with flavor. Additionally, cutting before baking helps the baklava cook evenly and prevents it from puffing up too much during the baking process.
Perfect Your Baking Time and Temperature
Baking baklava requires precision. A temperature of around 350°F (175°C) is generally ideal for achieving a beautifully golden-brown finish. Keep an eye on the baklava as it bakes, as oven temperatures can vary. The goal is to achieve a deep golden color, which usually takes about 40 to 50 minutes. If the top starts to brown too quickly, you can tent it with aluminum foil to prevent over-baking while allowing the rest of the pastry to cook through.
Serve with Care
Once your baklava has rested and absorbed the syrup, it’s time to serve! For an added touch, consider garnishing your baklava with crushed nuts, a dusting of powdered sugar, or a drizzle of extra syrup. Serve it with a side of Turkish coffee or tea to complement the rich flavors of the pastry. Remember to use a sharp knife to cut through the layers easily, ensuring that each piece retains its integrity.
By incorporating these tips into your baklava-making process, you can transform your pastry from good to exceptional. With practice and patience, you’ll be able to create baklava that not only looks stunning but also delights the palate with its harmonious blend of textures and flavors. Happy baking!
FAQs: Answering Your Baklava Queries
Q: Can I use different nuts in my baklava?
A: Absolutely! Feel free to experiment with different nuts like pecans or hazelnuts for a unique twist on traditional flavors.
Q: How long does baklava keep?
A: Baklava can be stored at room temperature for up to 2 weeks. Keep it in an airtight container to maintain freshness.
Q: Can baklava be frozen?
A: Yes, baklava freezes well. Wrap it tightly in plastic wrap and store in a freezer-safe container for up to 3 months.
Q: Is it possible to make baklava vegan?
A: Yes, substitute the butter with a plant-based alternative and use agave syrup instead of honey for a vegan-friendly version.
Conclusion: The Sweet Reward of Homemade Baklava
Crafting baklava with honey and nuts is an experience that combines culinary skill with cultural tradition. Each bite is a testament to the harmonious blend of crispy phyllo, rich nuts, and sweet honey syrup. Whether you’re making it for a festive occasion or simply to satisfy a sweet craving, baklava is sure to delight and impress.
By following this guide, you can confidently bring the flavors of this ancient dessert into your home, sharing a piece of culinary history with every slice. Enjoy the process, savor the results, and discover why baklava has remained a beloved treat across cultures and generations.
Print
Baklava with Honey and Nuts
Ingredients
Creating a memorable baklava begins with the right ingredients. Each component plays a crucial role in delivering the ultimate taste and texture. Here’s what you’ll need:
- 1 package phyllo dough (16 oz)
- 1 cup melted butter
- 2 cups mixed nuts (walnuts, almonds, pistachios, chopped)
- 1 teaspoon ground cinnamon
- 1 cup honey
- 1/2 cup sugar
- 1 cup water
- 1 teaspoon vanilla extract
Instructions
Creating baklava is as much an art as it is a science. Follow these steps to ensure your baklava is as delicious as it is beautiful.
Step 1: Preparation
- Preheat the Oven: Set your oven to 350°F (175°C) to ensure it’s ready when you are.
- Prepare the Nut Mixture: In a bowl, combine the chopped nuts with ground cinnamon. Set this mixture aside for layering.
Step 2: Layering the Phyllo
- Prepare the Baking Dish: Brush a 9×13 inch baking dish generously with melted butter to prevent sticking.
- Layer the Phyllo Dough: Lay down six sheets of phyllo dough, brushing each with melted butter. This helps create the flaky, crispy layers baklava is known for.
- Add the Nut Mixture: Sprinkle 1/4 of the nut mixture evenly over the phyllo.
Step 3: Repeating the Layers
- Continue Layering: Repeat the layering process—five more sheets of phyllo with butter, followed by the nut mixture—until all ingredients are used. Finish with six sheets of phyllo, each brushed with butter.
Step 4: Baking
- Cut the Baklava: Using a sharp knife, cut the layered dish into diamond shapes. This allows the honey syrup to penetrate the layers during baking.
- Bake: Place in the oven and bake for 30-35 minutes until the top is golden and crisp.
Step 5: Preparing the Honey Syrup
- Make the Syrup: In a saucepan, combine honey, sugar, water, and vanilla extract. Bring to a boil and let simmer for 10 minutes. This syrup is the sweet heart of the baklava.
Step 6: Finishing Touches
- Pour the Syrup Over: As soon as the baklava comes out of the oven, pour the hot syrup evenly over it. The sizzle and aroma are a sensory delight.
- Cool and Serve: Allow the baklava to cool completely before serving. This gives the syrup time to soak into every layer.
Nutrition
- Serving Size: one normal portion
- Calories: 150
- Sugar: 6g
- Fat: 8g
- Carbohydrates: 18g
- Protein: 2g