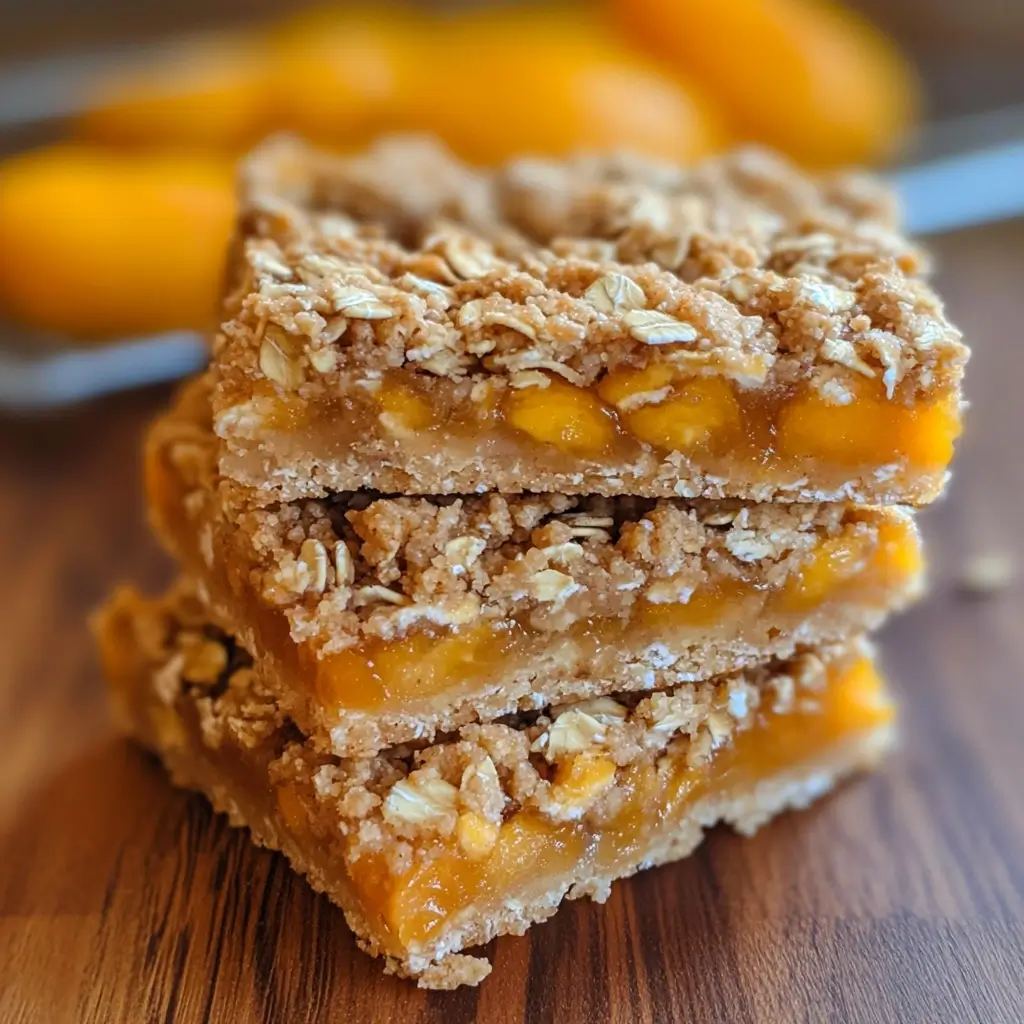

Apricot Oatmeal Bars are a delightful treat that have quickly become a favorite in my kitchen. There’s something wonderfully comforting about the combination of buttery oat crumble and sweet, tangy apricot preserves. From the moment the aroma starts to fill the house as they bake, to that first bite of warm, crumbly goodness, these bars are a guaranteed crowd-pleaser. My family absolutely adores them, and they’ve become a regular request for weekend baking sessions and potlucks alike. They strike the perfect balance – not too fussy to make, yet impressive enough to serve to guests. The simplicity of the ingredients and the straightforward instructions make these bars accessible for bakers of all skill levels. Whether you’re looking for a sweet afternoon snack, a delightful dessert to share, or a comforting treat to brighten your day, these Apricot Oatmeal Bars are sure to hit the spot.
Ingredients
The beauty of these Apricot Oatmeal Bars lies in their simplicity. Each ingredient plays a crucial role in creating the perfect balance of texture and flavor. Let’s delve into each component and understand why they are essential for this recipe.
- 1/2 Cup Butter, Softened to Room Temperature: Butter is the heart of these crumble bars, providing richness, flavor, and that melt-in-your-mouth texture. Using softened butter is crucial as it allows for proper creaming with the brown sugar, creating air pockets that contribute to a tender and crumbly base and topping. Room temperature butter should be pliable but still hold its shape; it shouldn’t be greasy or melted. If you forget to take your butter out in advance, you can quickly soften it by cutting it into smaller pieces and letting it sit at room temperature for about 15-20 minutes. Alternatively, you can microwave it in very short bursts (5-7 seconds at a time) turning it after each interval, being extremely careful not to melt it. For the best flavor, unsalted butter is recommended, allowing you to control the overall saltiness with the baking soda. However, if you only have salted butter on hand, you can use it, just consider reducing the baking soda by a tiny pinch.
- 1/2 Cup Packed Brown Sugar: Brown sugar is what gives these bars their delightful sweetness and a subtle molasses flavor that complements the oats and apricots beautifully. The “packed” instruction is important; it means you should firmly press the brown sugar into the measuring cup until it is level. This ensures you have the correct amount, as loosely packed brown sugar will result in less sweetness and potentially a drier texture. Brown sugar also contributes to the bars’ moistness and chewiness due to its molasses content. You can use either light or dark brown sugar for this recipe. Light brown sugar will offer a milder molasses flavor, while dark brown sugar will impart a richer, more pronounced molasses taste. Both will work wonderfully, so choose based on your personal preference. If you don’t have brown sugar, you can substitute it with granulated sugar, but the flavor profile will be slightly different, lacking the characteristic caramel notes of brown sugar. In a pinch, you can make your own brown sugar by mixing granulated sugar with molasses (approximately 1 tablespoon of molasses per cup of granulated sugar).
- 1/4 Teaspoon Baking Soda: Baking soda is a leavening agent that helps to create a slightly airy and tender crumb. It reacts with the brown sugar and the acidity in the apricot preserves to produce carbon dioxide, which contributes to the bars’ rise and texture. It’s crucial to measure the baking soda accurately; too much can result in a metallic taste, while too little might make the bars dense. Ensure your baking soda is fresh; it should be replaced every 6-12 months for optimal leavening power. To test its freshness, you can drop a small amount of baking soda into vinegar or lemon juice; it should fizz vigorously.
- 1 1/4 Cups Rolled Oats (Not Instant): Rolled oats are the star ingredient that provides the signature chewy texture and nutty flavor to these bars. It’s essential to use rolled oats, also known as old-fashioned oats, and not instant oats or steel-cut oats. Instant oats are too finely processed and will result in a mushy texture, while steel-cut oats are too coarse and will not bake properly in this recipe. Rolled oats have been steamed and flattened, which makes them cook relatively quickly and gives them a pleasant chewiness. They also add a wonderful heartiness and wholesome quality to these bars. You can use either regular rolled oats or quick-cooking rolled oats. Quick-cooking oats are simply rolled thinner, so they will work, but regular rolled oats are preferred for their slightly more robust texture. If you are gluten-free, ensure you are using certified gluten-free rolled oats, as oats themselves are naturally gluten-free but can be processed in facilities that also handle wheat.
- 3/4 Cup All-Purpose Flour: All-purpose flour provides structure to the bars, binding the ingredients together and creating a cohesive crumble. It works in conjunction with the oats to create the base and topping. When measuring flour, it’s best to use the “spoon and level” method to avoid packing it too tightly into the measuring cup, which can lead to dry bars. Spoon the flour lightly into the measuring cup and then level it off with a straight edge, like the back of a knife. If you are gluten-free, you can substitute all-purpose flour with a gluten-free all-purpose blend. Ensure the blend you choose is designed for baking and contains xanthan gum or another binder to replicate the structure provided by gluten.
- 1 Cup Apricot Preserves: Apricot preserves are the flavorful filling that brings a burst of fruity sweetness and a touch of tanginess to these bars. The preserves should be of good quality for the best flavor. Look for preserves that are chunky with visible pieces of apricot, rather than a smooth jelly. You can also use apricot jam, but preserves tend to have a more robust fruit flavor and texture. If you are not a fan of apricot, or simply want to try a variation, you can easily substitute with other fruit preserves or jams. Good alternatives include raspberry preserves, strawberry jam, peach preserves, or even fig jam. Each will provide a different flavor profile, allowing you to customize the bars to your liking. For a less sweet option, you can use fruit butter, like apple butter or pumpkin butter, for a warmer, spiced flavor.
Instructions
Creating these Apricot Oatmeal Bars is a breeze, even for novice bakers. Follow these step-by-step instructions for perfectly baked bars every time.
- Preheat the Oven and Prepare Baking Dish: Begin by preheating your oven to 350 degrees Fahrenheit (175 degrees Celsius). This ensures the oven is at the correct temperature when you place the bars in to bake, allowing for even cooking. While the oven is preheating, prepare your baking dish. An 8×8 inch or 9×9 inch square baking dish will work perfectly for this recipe. Spraying the dish with non-stick cooking spray is essential to prevent the bars from sticking and makes them easy to remove once cooled. Ensure you spray the bottom and sides of the dish thoroughly. Alternatively, you can grease the dish with butter or shortening and then dust it with flour for extra insurance against sticking. Lining the baking dish with parchment paper, leaving an overhang on the sides, is another excellent option. This creates “handles” that make lifting the baked bars out of the dish effortless.
- Combine Dry Ingredients and Butter: In a large mixing bowl, combine the softened butter, packed brown sugar, baking soda, rolled oats, and flour. This is the base for both the crust and the crumble topping. You have a few options for mixing these ingredients. The recipe suggests using a fork and knife or a pastry cutter. A pastry cutter is specifically designed for cutting butter into flour to create a crumbly texture, perfect for this recipe. If you don’t have a pastry cutter, using two knives in a scissor-like motion works well too. You can also use a fork to break up the butter and incorporate it into the dry ingredients. Alternatively, you can use your fingertips to rub the butter into the dry ingredients until the mixture resembles coarse crumbs. Avoid overmixing at this stage. You want to create a crumbly mixture, not a smooth dough. The goal is to have small pieces of butter coated in the dry ingredients, which will create pockets of air and result in a tender and crumbly texture when baked.
- Measure and Press Crust into Baking Dish: Once the oat mixture is crumbly, measure out 2 cups of it. This portion will form the base crust of the bars. Gently press this 2-cup portion evenly into the bottom of the prepared baking dish. Use your fingers or the back of a spoon to create a uniform layer. You want the crust to be compact enough to hold the filling but not too dense. Pressing it firmly but gently will achieve the ideal texture. Ensure the crust is spread evenly across the bottom of the dish, reaching all corners. A level crust will ensure even baking and a consistent texture throughout the bars.
- Spread Apricot Preserves: Carefully spread the apricot preserves over the prepared crust. Use a spoon or spatula to distribute the preserves evenly. Stop about 1/4 inch from the crust edge. This prevents the preserves from bubbling over the sides during baking and creating a sticky mess on the baking dish. A thin, even layer of preserves is ideal. If your preserves are very thick, you can gently warm them in a saucepan or microwave for a few seconds to make them easier to spread. Be careful not to overheat them, just warm enough to loosen them slightly.
- Sprinkle Crumble Topping: Sprinkle the remaining oat mixture (the portion you didn’t use for the crust) evenly over the top of the apricot preserves. This will form the crumble topping. Distribute it loosely and evenly, allowing some of the preserves to peek through. You don’t need to press down on the topping; simply scatter it over the preserves. The unevenness of the crumble topping contributes to the rustic charm and delightful texture of these bars.
- Bake to Golden Perfection: Bake in the preheated oven for 30-35 minutes, or until the top is golden brown and the apricot preserves are bubbly around the edges. The baking time may vary slightly depending on your oven, so it’s important to keep an eye on the bars. The crumble topping should be nicely browned, and the edges of the bars should be slightly pulling away from the sides of the dish. A toothpick inserted into the center of the oat crumble (not the preserves) should come out with moist crumbs attached, but not wet batter. If the topping is browning too quickly, you can loosely tent the baking dish with aluminum foil for the last 10-15 minutes of baking to prevent it from burning.
- Cool Completely, Cut, and Enjoy!: Once baked, remove the bars from the oven and let them cool completely in the baking dish before cutting into bars. This is crucial as the bars need time to set and firm up. Cutting them while they are still warm can result in crumbly and messy bars. Cooling allows the oat crumble to solidify and the preserves to thicken slightly. Allow at least 1-2 hours for cooling at room temperature, or you can speed up the process by refrigerating them for about 30-45 minutes. Once completely cool, cut the bars into squares or rectangles. For clean cuts, use a sharp knife and wipe it clean between cuts if necessary. The recipe suggests servings of 9 bars, but you can cut them into smaller squares for more servings or larger squares for fewer, more substantial portions. Enjoy these delicious Apricot Oatmeal Bars as a sweet snack, dessert, or even a treat with coffee or tea. They are best enjoyed within a few days of baking, stored in an airtight container at room temperature or in the refrigerator for longer storage.
Nutrition Facts
(Estimated, per serving, based on 9 servings. Nutritional values are approximate and can vary based on specific ingredients and brands used.)
- Servings: 9
- Calories per Serving: Approximately 250-300 calories
(Please note: This is a rough estimate. For precise nutritional information, use a nutrition calculator with the specific brands of ingredients you use.) Factors like the type of butter, brown sugar, and apricot preserves can influence the final calorie count. Generally, each bar will provide a moderate amount of carbohydrates, fats, and some protein from the oats. These bars are a sweet treat and should be enjoyed in moderation as part of a balanced diet.
Preparation Time
These Apricot Oatmeal Bars are wonderfully quick to prepare, making them perfect for when you need a delicious dessert in a hurry.
- Prep Time: 10 minutes
- Cook Time: 30 minutes
- Total Time: 40 minutes
The majority of the time is spent baking, while the active preparation is minimal. This recipe is ideal for busy weeknights or when you want a homemade treat without spending hours in the kitchen. The quick prep time also makes it a great recipe to involve kids in baking, as they can easily assist with measuring ingredients, mixing, and pressing the crust.
How to Serve
Apricot Oatmeal Bars are versatile and can be enjoyed in numerous ways. Here are some serving suggestions to elevate your enjoyment:
- Warm with a Scoop of Vanilla Ice Cream: Serve the bars warm, fresh from the oven (or slightly reheated), topped with a scoop of creamy vanilla ice cream. The contrast of warm bars and cold ice cream is heavenly.
- With a Dollop of Whipped Cream or Yogurt: A dollop of freshly whipped cream or a spoonful of Greek yogurt adds a touch of lightness and creaminess that complements the sweetness of the bars.
- Alongside Fresh Berries: Serve with a side of fresh berries like raspberries, blueberries, or strawberries. The tartness of the berries balances the sweetness of the apricot and adds a burst of freshness.
- With a Dusting of Powdered Sugar: A simple dusting of powdered sugar adds a touch of elegance and visual appeal.
- Paired with Coffee or Tea: These bars are a perfect accompaniment to a cup of hot coffee or tea, making them ideal for afternoon tea time or a cozy evening dessert.
- As a Lunchbox Treat: Once cooled, these bars are sturdy enough to pack in lunchboxes for a delightful midday treat for kids and adults alike.
- As Part of a Dessert Platter: Include these bars as part of a dessert platter with other treats for parties or gatherings. Their rustic charm and delicious flavor make them a welcome addition.
- Refrigerated for a Chewier Texture: Storing the bars in the refrigerator will make them slightly chewier and more dense, which some people prefer. Try them both ways to see which texture you enjoy more.
Additional Tips for Perfect Apricot Oatmeal Bars
To ensure your Apricot Oatmeal Bars are a resounding success, here are five additional tips:
- Don’t Overmix the Oat Mixture: When combining the butter and dry ingredients, mix just until crumbly. Overmixing can develop the gluten in the flour, resulting in tougher bars.
- Use Parchment Paper for Easy Removal: Lining your baking dish with parchment paper that overhangs the sides makes removing the baked bars from the dish incredibly easy and prevents sticking.
- Adjust Sweetness to Taste: If you prefer less sweet bars, you can slightly reduce the amount of brown sugar. Alternatively, for a richer sweetness, you can increase the brown sugar by a tablespoon or two.
- Experiment with Different Preserves: Don’t limit yourself to apricot! Try using other fruit preserves like raspberry, peach, strawberry, or fig for different flavor variations. Each preserve will create a unique twist on these classic bars.
- Let Them Cool Completely Before Cutting: Patience is key! Allow the bars to cool completely before cutting them. This allows them to firm up and prevents them from crumbling, resulting in cleaner and more defined bars.
Frequently Asked Questions (FAQ)
Here are some common questions about making Apricot Oatmeal Bars:
Q1: Can I use instant oats instead of rolled oats?
A: No, it’s not recommended to use instant oats. Instant oats are too finely processed and will result in a mushy and less textured bar. Rolled oats (old-fashioned oats) are essential for the chewy and hearty texture of these bars. Quick-cooking rolled oats can be used as a substitute in a pinch, but regular rolled oats are preferred.
Q2: Can I make these bars gluten-free?
A: Yes, you can easily make these bars gluten-free. Simply substitute the all-purpose flour with a gluten-free all-purpose flour blend. Ensure the blend is designed for baking and contains xanthan gum or another binder to help with structure. Also, make sure to use certified gluten-free rolled oats, as oats themselves are naturally gluten-free but can be processed in facilities that handle wheat.
Q3: Can I freeze Apricot Oatmeal Bars?
A: Yes, these bars freeze well. Once completely cooled and cut, wrap them individually in plastic wrap or place them in an airtight container. They can be frozen for up to 2-3 months. To thaw, simply remove them from the freezer and let them thaw at room temperature for about 30-60 minutes. They can also be enjoyed straight from the freezer for a firmer, chilled treat.
Q4: My crumble topping is browning too quickly. What should I do?
A: If your crumble topping is browning too quickly before the bars are fully baked, you can loosely tent the baking dish with aluminum foil. This will shield the topping from direct heat and prevent it from burning while allowing the bars to continue baking through.
Q5: Can I add nuts to these bars?
A: Absolutely! Adding nuts can enhance the flavor and texture of these bars. You can add chopped nuts like walnuts, pecans, or almonds to the oat mixture for both the crust and the crumble topping. About 1/2 cup to 1 cup of chopped nuts would be a good addition. You can also toast the nuts before adding them for a deeper, nuttier flavor. Simply spread the nuts on a baking sheet and bake at 350°F (175°C) for 5-7 minutes, or until lightly golden and fragrant. Let them cool before chopping and adding to the recipe.
Print
Apricot Oatmeal Bars Recipe
Ingredients
- 1/2 Cup Butter, Softened to Room Temperature: Butter is the heart of these crumble bars, providing richness, flavor, and that melt-in-your-mouth texture. Using softened butter is crucial as it allows for proper creaming with the brown sugar, creating air pockets that contribute to a tender and crumbly base and topping. Room temperature butter should be pliable but still hold its shape; it shouldn’t be greasy or melted. If you forget to take your butter out in advance, you can quickly soften it by cutting it into smaller pieces and letting it sit at room temperature for about 15-20 minutes. Alternatively, you can microwave it in very short bursts (5–7 seconds at a time) turning it after each interval, being extremely careful not to melt it. For the best flavor, unsalted butter is recommended, allowing you to control the overall saltiness with the baking soda. However, if you only have salted butter on hand, you can use it, just consider reducing the baking soda by a tiny pinch.
- 1/2 Cup Packed Brown Sugar: Brown sugar is what gives these bars their delightful sweetness and a subtle molasses flavor that complements the oats and apricots beautifully. The “packed” instruction is important; it means you should firmly press the brown sugar into the measuring cup until it is level. This ensures you have the correct amount, as loosely packed brown sugar will result in less sweetness and potentially a drier texture. Brown sugar also contributes to the bars’ moistness and chewiness due to its molasses content. You can use either light or dark brown sugar for this recipe. Light brown sugar will offer a milder molasses flavor, while dark brown sugar will impart a richer, more pronounced molasses taste. Both will work wonderfully, so choose based on your personal preference. If you don’t have brown sugar, you can substitute it with granulated sugar, but the flavor profile will be slightly different, lacking the characteristic caramel notes of brown sugar. In a pinch, you can make your own brown sugar by mixing granulated sugar with molasses (approximately 1 tablespoon of molasses per cup of granulated sugar).
- 1/4 Teaspoon Baking Soda: Baking soda is a leavening agent that helps to create a slightly airy and tender crumb. It reacts with the brown sugar and the acidity in the apricot preserves to produce carbon dioxide, which contributes to the bars’ rise and texture. It’s crucial to measure the baking soda accurately; too much can result in a metallic taste, while too little might make the bars dense. Ensure your baking soda is fresh; it should be replaced every 6-12 months for optimal leavening power. To test its freshness, you can drop a small amount of baking soda into vinegar or lemon juice; it should fizz vigorously.
- 1 1/4 Cups Rolled Oats (Not Instant): Rolled oats are the star ingredient that provides the signature chewy texture and nutty flavor to these bars. It’s essential to use rolled oats, also known as old-fashioned oats, and not instant oats or steel-cut oats. Instant oats are too finely processed and will result in a mushy texture, while steel-cut oats are too coarse and will not bake properly in this recipe. Rolled oats have been steamed and flattened, which makes them cook relatively quickly and gives them a pleasant chewiness. They also add a wonderful heartiness and wholesome quality to these bars. You can use either regular rolled oats or quick-cooking rolled oats. Quick-cooking oats are simply rolled thinner, so they will work, but regular rolled oats are preferred for their slightly more robust texture. If you are gluten-free, ensure you are using certified gluten-free rolled oats, as oats themselves are naturally gluten-free but can be processed in facilities that also handle wheat.
- 3/4 Cup All-Purpose Flour: All-purpose flour provides structure to the bars, binding the ingredients together and creating a cohesive crumble. It works in conjunction with the oats to create the base and topping. When measuring flour, it’s best to use the “spoon and level” method to avoid packing it too tightly into the measuring cup, which can lead to dry bars. Spoon the flour lightly into the measuring cup and then level it off with a straight edge, like the back of a knife. If you are gluten-free, you can substitute all-purpose flour with a gluten-free all-purpose blend. Ensure the blend you choose is designed for baking and contains xanthan gum or another binder to replicate the structure provided by gluten.
- 1 Cup Apricot Preserves: Apricot preserves are the flavorful filling that brings a burst of fruity sweetness and a touch of tanginess to these bars. The preserves should be of good quality for the best flavor. Look for preserves that are chunky with visible pieces of apricot, rather than a smooth jelly. You can also use apricot jam, but preserves tend to have a more robust fruit flavor and texture. If you are not a fan of apricot, or simply want to try a variation, you can easily substitute with other fruit preserves or jams. Good alternatives include raspberry preserves, strawberry jam, peach preserves, or even fig jam. Each will provide a different flavor profile, allowing you to customize the bars to your liking. For a less sweet option, you can use fruit butter, like apple butter or pumpkin butter, for a warmer, spiced flavor.
Instructions
- Preheat the Oven and Prepare Baking Dish: Begin by preheating your oven to 350 degrees Fahrenheit (175 degrees Celsius). This ensures the oven is at the correct temperature when you place the bars in to bake, allowing for even cooking. While the oven is preheating, prepare your baking dish. An 8×8 inch or 9×9 inch square baking dish will work perfectly for this recipe. Spraying the dish with non-stick cooking spray is essential to prevent the bars from sticking and makes them easy to remove once cooled. Ensure you spray the bottom and sides of the dish thoroughly. Alternatively, you can grease the dish with butter or shortening and then dust it with flour for extra insurance against sticking. Lining the baking dish with parchment paper, leaving an overhang on the sides, is another excellent option. This creates “handles” that make lifting the baked bars out of the dish effortless.
- Combine Dry Ingredients and Butter: In a large mixing bowl, combine the softened butter, packed brown sugar, baking soda, rolled oats, and flour. This is the base for both the crust and the crumble topping. You have a few options for mixing these ingredients. The recipe suggests using a fork and knife or a pastry cutter. A pastry cutter is specifically designed for cutting butter into flour to create a crumbly texture, perfect for this recipe. If you don’t have a pastry cutter, using two knives in a scissor-like motion works well too. You can also use a fork to break up the butter and incorporate it into the dry ingredients. Alternatively, you can use your fingertips to rub the butter into the dry ingredients until the mixture resembles coarse crumbs. Avoid overmixing at this stage. You want to create a crumbly mixture, not a smooth dough. The goal is to have small pieces of butter coated in the dry ingredients, which will create pockets of air and result in a tender and crumbly texture when baked.
- Measure and Press Crust into Baking Dish: Once the oat mixture is crumbly, measure out 2 cups of it. This portion will form the base crust of the bars. Gently press this 2-cup portion evenly into the bottom of the prepared baking dish. Use your fingers or the back of a spoon to create a uniform layer. You want the crust to be compact enough to hold the filling but not too dense. Pressing it firmly but gently will achieve the ideal texture. Ensure the crust is spread evenly across the bottom of the dish, reaching all corners. A level crust will ensure even baking and a consistent texture throughout the bars.
- Spread Apricot Preserves: Carefully spread the apricot preserves over the prepared crust. Use a spoon or spatula to distribute the preserves evenly. Stop about 1/4 inch from the crust edge. This prevents the preserves from bubbling over the sides during baking and creating a sticky mess on the baking dish. A thin, even layer of preserves is ideal. If your preserves are very thick, you can gently warm them in a saucepan or microwave for a few seconds to make them easier to spread. Be careful not to overheat them, just warm enough to loosen them slightly.
- Sprinkle Crumble Topping: Sprinkle the remaining oat mixture (the portion you didn’t use for the crust) evenly over the top of the apricot preserves. This will form the crumble topping. Distribute it loosely and evenly, allowing some of the preserves to peek through. You don’t need to press down on the topping; simply scatter it over the preserves. The unevenness of the crumble topping contributes to the rustic charm and delightful texture of these bars.
- Bake to Golden Perfection: Bake in the preheated oven for 30-35 minutes, or until the top is golden brown and the apricot preserves are bubbly around the edges. The baking time may vary slightly depending on your oven, so it’s important to keep an eye on the bars. The crumble topping should be nicely browned, and the edges of the bars should be slightly pulling away from the sides of the dish. A toothpick inserted into the center of the oat crumble (not the preserves) should come out with moist crumbs attached, but not wet batter. If the topping is browning too quickly, you can loosely tent the baking dish with aluminum foil for the last 10-15 minutes of baking to prevent it from burning.
- Cool Completely, Cut, and Enjoy!: Once baked, remove the bars from the oven and let them cool completely in the baking dish before cutting into bars. This is crucial as the bars need time to set and firm up. Cutting them while they are still warm can result in crumbly and messy bars. Cooling allows the oat crumble to solidify and the preserves to thicken slightly. Allow at least 1-2 hours for cooling at room temperature, or you can speed up the process by refrigerating them for about 30-45 minutes. Once completely cool, cut the bars into squares or rectangles. For clean cuts, use a sharp knife and wipe it clean between cuts if necessary. The recipe suggests servings of 9 bars, but you can cut them into smaller squares for more servings or larger squares for fewer, more substantial portions. Enjoy these delicious Apricot Oatmeal Bars as a sweet snack, dessert, or even a treat with coffee or tea. They are best enjoyed within a few days of baking, stored in an airtight container at room temperature or in the refrigerator for longer storage.
Nutrition
- Serving Size: one normal portion
- Calories: 250-300