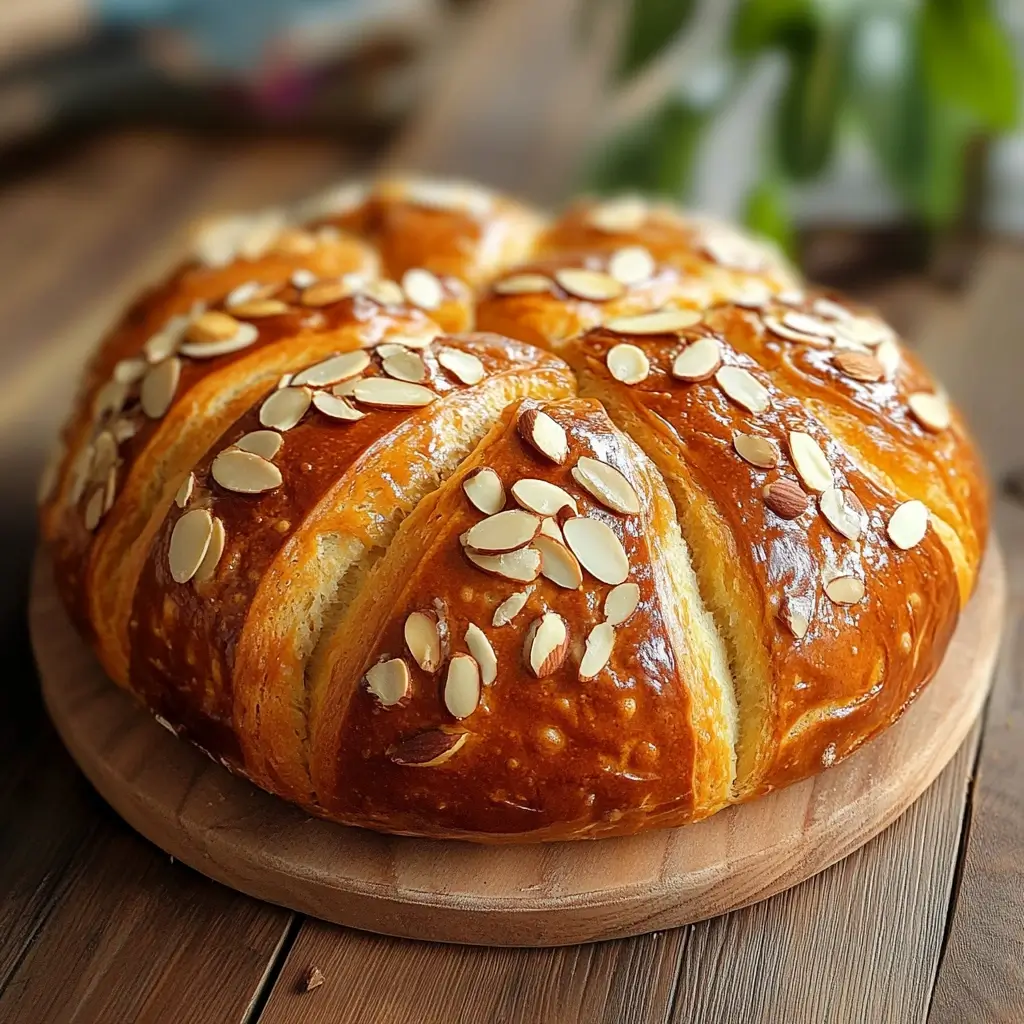
Easter in our home is synonymous with certain cherished traditions, and among them, the aroma of freshly baked Easter bread wafting from the kitchen holds a special place. For years, I’ve been crafting this Traditional Easter Bread with Almonds, a recipe passed down through generations, and every time it graces our table, it feels like a warm embrace of heritage and togetherness. The soft, slightly sweet dough, studded with crunchy almonds and subtly flavored with citrus zest, is simply irresistible. My family devours it slice after slice, especially warm from the oven, often with a smear of sweet butter or a dollop of homemade jam. It’s more than just bread; it’s a symbol of celebration, renewal, and the joy of sharing delicious food with loved ones. This year, I decided to document this beloved recipe, hoping to bring the same joy and tradition to your Easter celebrations. Prepare to fill your home with the heavenly scent of baking bread and create memories that will last a lifetime with this truly special treat.
Ingredients
To embark on this delightful baking journey, gather these essential ingredients. We’ll break them down into categories for ease of preparation:
For the Dough:
- All-Purpose Flour: 500g (approximately 4 cups), plus extra for dusting. The foundation of our bread, providing structure and texture. Opt for good quality all-purpose flour for best results.
- Active Dry Yeast: 7g (1 packet or 2 ¼ teaspoons). The magic ingredient that brings our dough to life, creating that light and airy texture we crave in Easter bread. Ensure your yeast is fresh and active.
- Granulated Sugar: 100g (½ cup). Adds a touch of sweetness to balance the flavors and also feeds the yeast, aiding in its activation.
- Warm Milk: 250ml (1 cup), lukewarm, around 100-110°F (38-43°C). Provides moisture to the dough and activates the yeast. The temperature is crucial – too hot and it will kill the yeast, too cold and it won’t activate properly.
- Eggs: 3 large, at room temperature. Enrich the dough, adding richness, color, and structure. Room temperature eggs incorporate more easily and create a smoother dough.
- Unsalted Butter: 85g (⅓ cup), melted and cooled slightly. Adds tenderness and flavor to the bread. Ensure it’s cooled slightly so it doesn’t cook the eggs or yeast.
- Lemon Zest: 1 tablespoon, finely grated. Lends a bright, citrusy aroma and flavor that beautifully complements the almonds and sweetness. Use a microplane or fine grater to avoid the bitter white pith.
- Orange Zest: 1 tablespoon, finely grated. Adds another layer of citrus complexity and warmth to the bread. Similar to lemon zest, grate only the colored part of the orange peel.
- Vanilla Extract: 1 teaspoon. Enhances the overall flavor profile, adding a touch of warmth and sweetness. Use pure vanilla extract for the best flavor.
- Salt: 1 teaspoon. Essential for balancing the sweetness and enhancing the other flavors in the dough. It also controls yeast activity.
For the Almond Topping:
- Egg Wash: 1 large egg, beaten with 1 tablespoon of water. Provides a glossy, golden-brown finish to the bread during baking.
- Sliced Almonds: 100g (1 cup). The star of our topping, adding a delightful crunch and nutty flavor. Use blanched sliced almonds for a more refined look.
- Pearl Sugar (Optional): For sprinkling. Adds a beautiful sparkle and extra sweetness. If you can’t find pearl sugar, coarse sugar or sanding sugar can be used as a substitute.
Ingredient Notes:
- Flour Type: While all-purpose flour works beautifully, you can also experiment with bread flour for a slightly chewier texture.
- Milk Alternatives: For a dairy-free version, you can substitute the milk with unsweetened almond milk or soy milk.
- Citrus Zest: Freshly grated zest is crucial for the best flavor. Avoid using pre-grated zest, which can be dry and less aromatic.
- Almond Variations: You can use whole almonds, slivered almonds, or even chopped almonds for the topping, depending on your preference. Toasted almonds will provide an even deeper nutty flavor.
- Sweetness Adjustment: If you prefer a less sweet bread, you can slightly reduce the amount of sugar.
Instructions
Now, let’s embark on the step-by-step journey of creating this delicious Traditional Easter Bread with Almonds. Follow these instructions carefully for baking success:
Step 1: Activate the Yeast
- In a large bowl or the bowl of a stand mixer, combine the warm milk, granulated sugar, and active dry yeast.
- Gently stir to combine and let it stand for 5-10 minutes. This process, known as “proofing” the yeast, ensures that the yeast is active and ready to leaven the dough. You should see small bubbles forming on the surface, indicating the yeast is working. If no bubbles form, your yeast might be inactive, and you may need to start with fresh yeast.
Step 2: Combine Wet Ingredients
- To the yeast mixture, add the eggs, melted and cooled butter, lemon zest, orange zest, and vanilla extract.
- Whisk or stir well to combine all the wet ingredients.
Step 3: Gradually Add Dry Ingredients
- Gradually add the all-purpose flour to the wet ingredients, one cup at a time, mixing on low speed with a stand mixer fitted with a dough hook or by hand with a wooden spoon.
- After each addition of flour, mix until just combined.
- Add the salt along with the last portion of flour.
- Continue mixing until a shaggy dough forms.
Step 4: Knead the Dough
- Turn the dough out onto a lightly floured surface.
- Knead the dough for 8-10 minutes until it becomes smooth, elastic, and slightly tacky but not sticky. If using a stand mixer, knead with the dough hook on medium-low speed for 6-8 minutes.
- To knead by hand, push the dough away from you with the heel of your hand, fold it in half towards you, and turn it 90 degrees. Repeat this process rhythmically. The dough should become increasingly smooth and elastic as you knead.
- Perform the windowpane test to check for sufficient kneading: Stretch a small piece of dough thin enough to see light through it without tearing. If it passes the windowpane test, it’s sufficiently kneaded. If it tears easily, knead for a minute or two more.
Step 5: First Rise (Bulk Fermentation)
- Lightly grease a large bowl with oil or butter.
- Place the kneaded dough in the greased bowl and turn it to coat all sides with the grease.
- Cover the bowl tightly with plastic wrap or a clean kitchen towel.
- Let the dough rise in a warm place (around 75-80°F or 24-27°C) for 1-1.5 hours, or until it has doubled in size. A warm oven (turned off) or a warm spot in your kitchen works well.
- The first rise is crucial for developing flavor and texture in the bread.
Step 6: Shape the Bread
- Gently punch down the risen dough to release the air.
- Turn the dough out onto a lightly floured surface.
- Divide the dough into two equal portions.
- Shape each portion into a round or oblong loaf. You can also create braids or other decorative shapes if desired. For a simple round loaf, gently tuck the edges of the dough underneath to create a smooth surface.
- Place the shaped loaves on a baking sheet lined with parchment paper, leaving enough space between them for expansion during the second rise.
Step 7: Second Rise (Proofing)
- Cover the shaped loaves loosely with plastic wrap or a clean kitchen towel.
- Let them rise in a warm place for another 45-60 minutes, or until they have almost doubled in size. This second rise, called proofing, allows the dough to become light and airy before baking.
- Preheat your oven to 350°F (175°C) about 20 minutes before the end of the second rise.
Step 8: Prepare the Almond Topping and Bake
- Gently brush the tops of the risen loaves with the egg wash, ensuring even coverage.
- Sprinkle generously with sliced almonds. If using, sprinkle with pearl sugar as well.
- Bake in the preheated oven for 30-35 minutes, or until the loaves are golden brown and sound hollow when tapped on the bottom. The internal temperature should reach 200-210°F (93-99°C) for optimal doneness.
- If the tops are browning too quickly, tent them loosely with aluminum foil.
Step 9: Cool and Enjoy
- Once baked, remove the Easter bread from the oven and let it cool on the baking sheet for a few minutes.
- Transfer the loaves to a wire rack to cool completely before slicing and serving. While tempting, resist slicing into the bread while it’s still hot, as it will continue to bake internally and slicing too soon can result in a gummy texture.
- Enjoy the Traditional Easter Bread with Almonds warm or at room temperature.
Nutrition Facts
(Estimated, per serving – based on 12 servings per loaf, recipe as written. Nutritional values are approximations and can vary based on specific ingredients and portion sizes.)
- Servings Per Loaf: 12
- Serving Size: 1 slice (approximately 1/12th of a loaf)
- Calories Per Serving: Approximately 250-300 kcal
- Total Fat: 10-12g
- Saturated Fat: 4-5g
- Cholesterol: 50-60mg
- Sodium: 150-200mg
- Total Carbohydrates: 35-40g
- Dietary Fiber: 1-2g
- Sugars: 8-10g
- Protein: 5-6g
Note: These values are estimations. For precise nutritional information, use a nutrition calculator with the specific brands and quantities of ingredients you use. This bread is moderately high in carbohydrates and calories due to its ingredients. Enjoy in moderation as part of a balanced diet.
Preparation Time
- Active Preparation Time: Approximately 45-60 minutes (including ingredient gathering, dough mixing, kneading, and shaping)
- Inactive Time (Rising): Approximately 2-2.5 hours (for both the first and second rise)
- Baking Time: 30-35 minutes
- Total Time: Approximately 3.5-4 hours
This recipe requires a bit of time commitment, primarily due to the rising periods. However, the active preparation time is relatively manageable, and the delicious results are well worth the effort. Consider breaking up the process over a few hours or even starting the dough the day before and letting it rise slowly in the refrigerator overnight for enhanced flavor development.
How to Serve
This Traditional Easter Bread with Almonds is incredibly versatile and can be enjoyed in numerous ways throughout your Easter celebrations and beyond. Here are some delightful serving suggestions:
- Breakfast or Brunch:
- Serve warm slices with a pat of butter, homemade jam, or fruit preserves.
- Pair it with a cup of coffee, tea, or a glass of fresh juice for a satisfying morning meal.
- Use it as a base for French toast for a special Easter brunch treat.
- Dessert:
- Enjoy a slice as a light dessert after your Easter dinner.
- Serve it alongside a scoop of vanilla ice cream or a dollop of whipped cream.
- Drizzle with a simple glaze made from powdered sugar and milk or lemon juice for added sweetness.
- Snack or Tea Time:
- Perfect for an afternoon snack with a cup of tea or coffee.
- Pack slices for a picnic or outdoor Easter egg hunt.
- Enjoy it plain for a simple and satisfying treat.
- With Savory Companiments:
- While traditionally sweet, this bread can also be paired with savory items.
- Serve it alongside cheese and charcuterie for an appetizer platter.
- Enjoy it with a light soup or salad for a balanced meal.
- Gift Giving:
- Bake a loaf to share with friends, family, or neighbors as a thoughtful Easter gift.
- Wrap it in decorative paper or cellophane and tie with a ribbon for a beautiful presentation.
Additional Tips for Baking Success
To ensure your Traditional Easter Bread with Almonds turns out perfectly every time, here are five essential tips:
- Yeast Activation is Key: Always check the freshness and activity of your yeast. Proofing it in warm milk with sugar is a crucial step. If the yeast doesn’t bubble and become frothy after 5-10 minutes, it’s likely inactive and should be replaced. Using active yeast is the foundation for a light and airy bread.
- Don’t Overknead or Underknead: Kneading is essential for developing gluten, which gives the bread its structure. Knead the dough until it’s smooth and elastic, passing the windowpane test. Overkneading can result in tough bread, while underkneading can lead to a dense and less risen loaf.
- Warm and Consistent Rising Environment: Yeast thrives in warm, humid environments. Find a warm spot in your kitchen for rising, or use the “proof” setting on your oven if available. Consistent temperature is crucial for even rising. Avoid drafts or overly cold temperatures, which can slow down or inhibit yeast activity.
- Don’t Rush the Rise: Allow the dough to rise fully in both the first and second rise. Rushing the rising process will result in a denser, less flavorful bread. Patience is key in bread baking. The dough should double in size during the first rise and almost double during the second rise.
- Cool Completely Before Slicing: While the aroma of freshly baked bread is incredibly tempting, resist the urge to slice into it while it’s still hot. Allowing the bread to cool completely on a wire rack allows the internal structure to set, resulting in cleaner slices and a better texture. Slicing too soon can lead to a gummy interior.
FAQ Section
Q1: Can I make this Easter bread ahead of time?
A: Yes, you can prepare the dough ahead of time. After the first rise, punch down the dough, wrap it tightly in plastic wrap, and refrigerate it for up to 24 hours. When ready to bake, let the dough come to room temperature for about an hour, then proceed with shaping and the second rise as instructed. Baked bread is best enjoyed fresh but can be stored at room temperature in an airtight container for 2-3 days or frozen for longer storage.
Q2: Can I use instant yeast instead of active dry yeast?
A: Yes, you can substitute instant yeast for active dry yeast. Use the same amount (7g or 2 ¼ teaspoons). With instant yeast, you can typically skip the proofing step and add the yeast directly to the dry ingredients. However, proofing is still a good practice to ensure yeast activity. If using instant yeast, you can combine all dry ingredients, then add warm liquids and proceed with kneading.
Q3: Can I add other flavorings to the dough?
A: Absolutely! Feel free to experiment with other flavorings. Consider adding:
* Anise seeds: For a traditional Italian Easter bread flavor.
* Cardamom: For a warm, aromatic spice note.
* Orange blossom water: For a floral and fragrant touch.
* Raisins or candied fruits: For a more festive and fruit-studded bread.
Adjust the amounts of flavorings to your preference.
Q4: What if I don’t have pearl sugar for the topping?
A: Pearl sugar adds a beautiful sparkle and texture, but it’s optional. If you don’t have it, you can use:
* Coarse sugar or sanding sugar: These will provide a similar visual appeal and a touch of extra sweetness.
* Turbinado sugar: Offers a slightly more rustic look and a hint of molasses flavor.
* Leave it plain: The sliced almonds alone are a delicious and beautiful topping.
Q5: Can I freeze Easter bread?
A: Yes, Easter bread freezes well. Allow the bread to cool completely after baking. Wrap it tightly in plastic wrap, then in aluminum foil, or place it in a freezer-safe bag. Freeze for up to 2-3 months. To thaw, remove from the freezer and let it thaw at room temperature in its wrapping. You can also reheat it briefly in a low oven to refresh its texture and aroma.
This Traditional Easter Bread with Almonds is more than just a recipe; it’s an invitation to create a cherished tradition in your own home. From the fragrant aroma filling your kitchen to the delighted smiles around your Easter table, this bread embodies the spirit of the season. Enjoy the process of baking, the joy of sharing, and the delicious taste of this time-honored treat. Happy Easter Baking!
Print
Almond-Kissed Easter Bread Recipe
Ingredients
For the Dough:
- All-Purpose Flour: 500g (approximately 4 cups), plus extra for dusting. The foundation of our bread, providing structure and texture. Opt for good quality all-purpose flour for best results.
- Active Dry Yeast: 7g (1 packet or 2 ¼ teaspoons). The magic ingredient that brings our dough to life, creating that light and airy texture we crave in Easter bread. Ensure your yeast is fresh and active.
- Granulated Sugar: 100g (½ cup). Adds a touch of sweetness to balance the flavors and also feeds the yeast, aiding in its activation.
- Warm Milk: 250ml (1 cup), lukewarm, around 100-110°F (38-43°C). Provides moisture to the dough and activates the yeast. The temperature is crucial – too hot and it will kill the yeast, too cold and it won’t activate properly.
- Eggs: 3 large, at room temperature. Enrich the dough, adding richness, color, and structure. Room temperature eggs incorporate more easily and create a smoother dough.
- Unsalted Butter: 85g (⅓ cup), melted and cooled slightly. Adds tenderness and flavor to the bread. Ensure it’s cooled slightly so it doesn’t cook the eggs or yeast.
- Lemon Zest: 1 tablespoon, finely grated. Lends a bright, citrusy aroma and flavor that beautifully complements the almonds and sweetness. Use a microplane or fine grater to avoid the bitter white pith.
- Orange Zest: 1 tablespoon, finely grated. Adds another layer of citrus complexity and warmth to the bread. Similar to lemon zest, grate only the colored part of the orange peel.
- Vanilla Extract: 1 teaspoon. Enhances the overall flavor profile, adding a touch of warmth and sweetness. Use pure vanilla extract for the best flavor.
- Salt: 1 teaspoon. Essential for balancing the sweetness and enhancing the other flavors in the dough. It also controls yeast activity.
Instructions
Step 1: Activate the Yeast
- In a large bowl or the bowl of a stand mixer, combine the warm milk, granulated sugar, and active dry yeast.
- Gently stir to combine and let it stand for 5-10 minutes. This process, known as “proofing” the yeast, ensures that the yeast is active and ready to leaven the dough. You should see small bubbles forming on the surface, indicating the yeast is working. If no bubbles form, your yeast might be inactive, and you may need to start with fresh yeast.
Step 2: Combine Wet Ingredients
- To the yeast mixture, add the eggs, melted and cooled butter, lemon zest, orange zest, and vanilla extract.
- Whisk or stir well to combine all the wet ingredients.
Step 3: Gradually Add Dry Ingredients
- Gradually add the all-purpose flour to the wet ingredients, one cup at a time, mixing on low speed with a stand mixer fitted with a dough hook or by hand with a wooden spoon.
- After each addition of flour, mix until just combined.
- Add the salt along with the last portion of flour.
- Continue mixing until a shaggy dough forms.
Step 4: Knead the Dough
- Turn the dough out onto a lightly floured surface.
- Knead the dough for 8-10 minutes until it becomes smooth, elastic, and slightly tacky but not sticky. If using a stand mixer, knead with the dough hook on medium-low speed for 6-8 minutes.
- To knead by hand, push the dough away from you with the heel of your hand, fold it in half towards you, and turn it 90 degrees. Repeat this process rhythmically. The dough should become increasingly smooth and elastic as you knead.
- Perform the windowpane test to check for sufficient kneading: Stretch a small piece of dough thin enough to see light through it without tearing. If it passes the windowpane test, it’s sufficiently kneaded. If it tears easily, knead for a minute or two more.
Step 5: First Rise (Bulk Fermentation)
- Lightly grease a large bowl with oil or butter.
- Place the kneaded dough in the greased bowl and turn it to coat all sides with the grease.
- Cover the bowl tightly with plastic wrap or a clean kitchen towel.
- Let the dough rise in a warm place (around 75-80°F or 24-27°C) for 1-1.5 hours, or until it has doubled in size. A warm oven (turned off) or a warm spot in your kitchen works well.
- The first rise is crucial for developing flavor and texture in the bread.
Step 6: Shape the Bread
- Gently punch down the risen dough to release the air.
- Turn the dough out onto a lightly floured surface.
- Divide the dough into two equal portions.
- Shape each portion into a round or oblong loaf. You can also create braids or other decorative shapes if desired. For a simple round loaf, gently tuck the edges of the dough underneath to create a smooth surface.
- Place the shaped loaves on a baking sheet lined with parchment paper, leaving enough space between them for expansion during the second rise.
Step 7: Second Rise (Proofing)
- Cover the shaped loaves loosely with plastic wrap or a clean kitchen towel.
- Let them rise in a warm place for another 45-60 minutes, or until they have almost doubled in size. This second rise, called proofing, allows the dough to become light and airy before baking.
- Preheat your oven to 350°F (175°C) about 20 minutes before the end of the second rise.
Step 8: Prepare the Almond Topping and Bake
- Gently brush the tops of the risen loaves with the egg wash, ensuring even coverage.
- Sprinkle generously with sliced almonds. If using, sprinkle with pearl sugar as well.
- Bake in the preheated oven for 30-35 minutes, or until the loaves are golden brown and sound hollow when tapped on the bottom. The internal temperature should reach 200-210°F (93-99°C) for optimal doneness.
- If the tops are browning too quickly, tent them loosely with aluminum foil.
Step 9: Cool and Enjoy
- Once baked, remove the Easter bread from the oven and let it cool on the baking sheet for a few minutes.
- Transfer the loaves to a wire rack to cool completely before slicing and serving. While tempting, resist slicing into the bread while it’s still hot, as it will continue to bake internally and slicing too soon can result in a gummy texture.
- Enjoy the Traditional Easter Bread with Almonds warm or at room temperature.
Nutrition
- Serving Size: one normal portion
- Calories: 250-300
- Sugar: 8-10g
- Sodium: 150-200mg
- Fat: 10-12g
- Saturated Fat: 4-5g
- Carbohydrates: 35-40g
- Fiber: 1-2g
- Protein: 5-6g
- Cholesterol: 50-60mg